Posted on

Dave’s Divine & Dulcet Devil.

Hello!

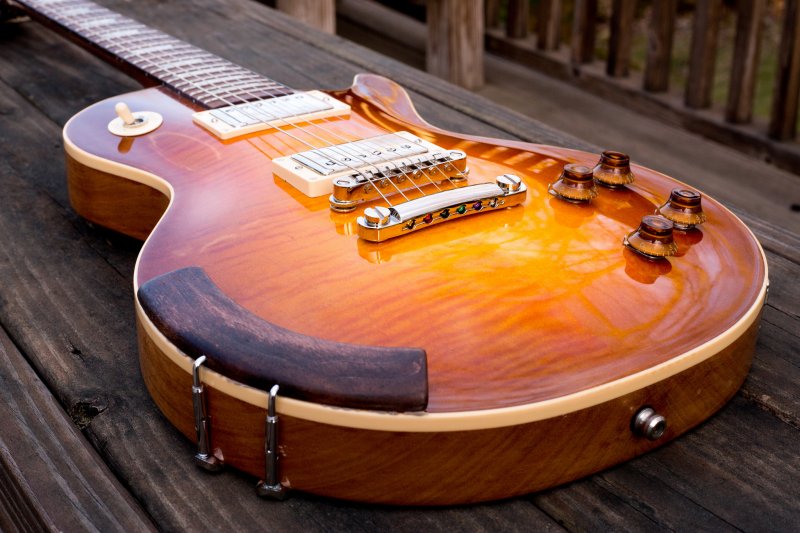
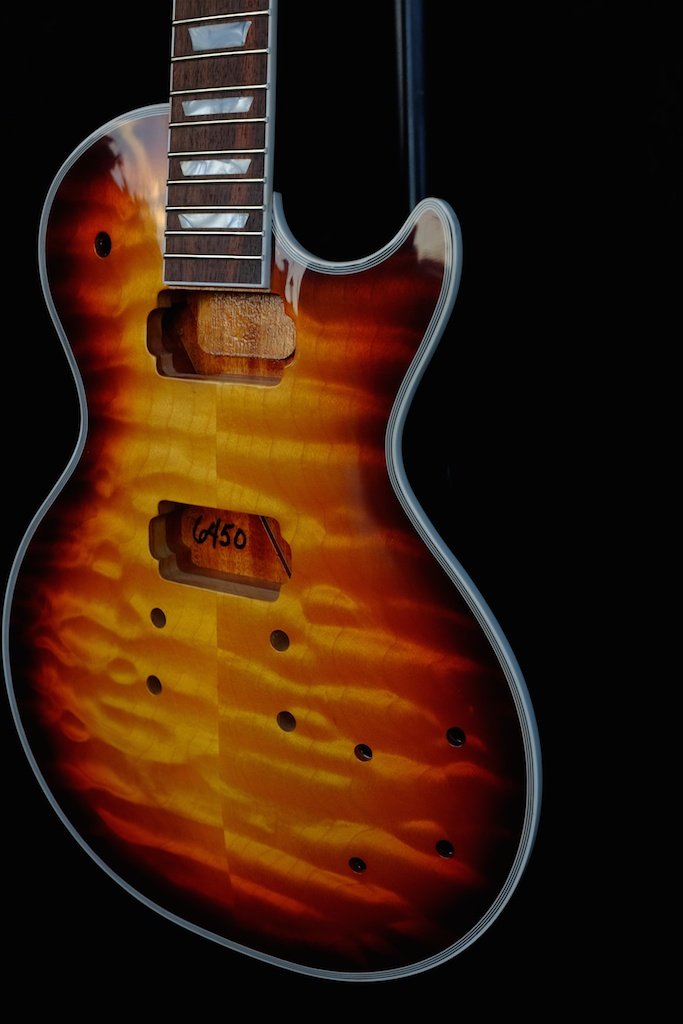
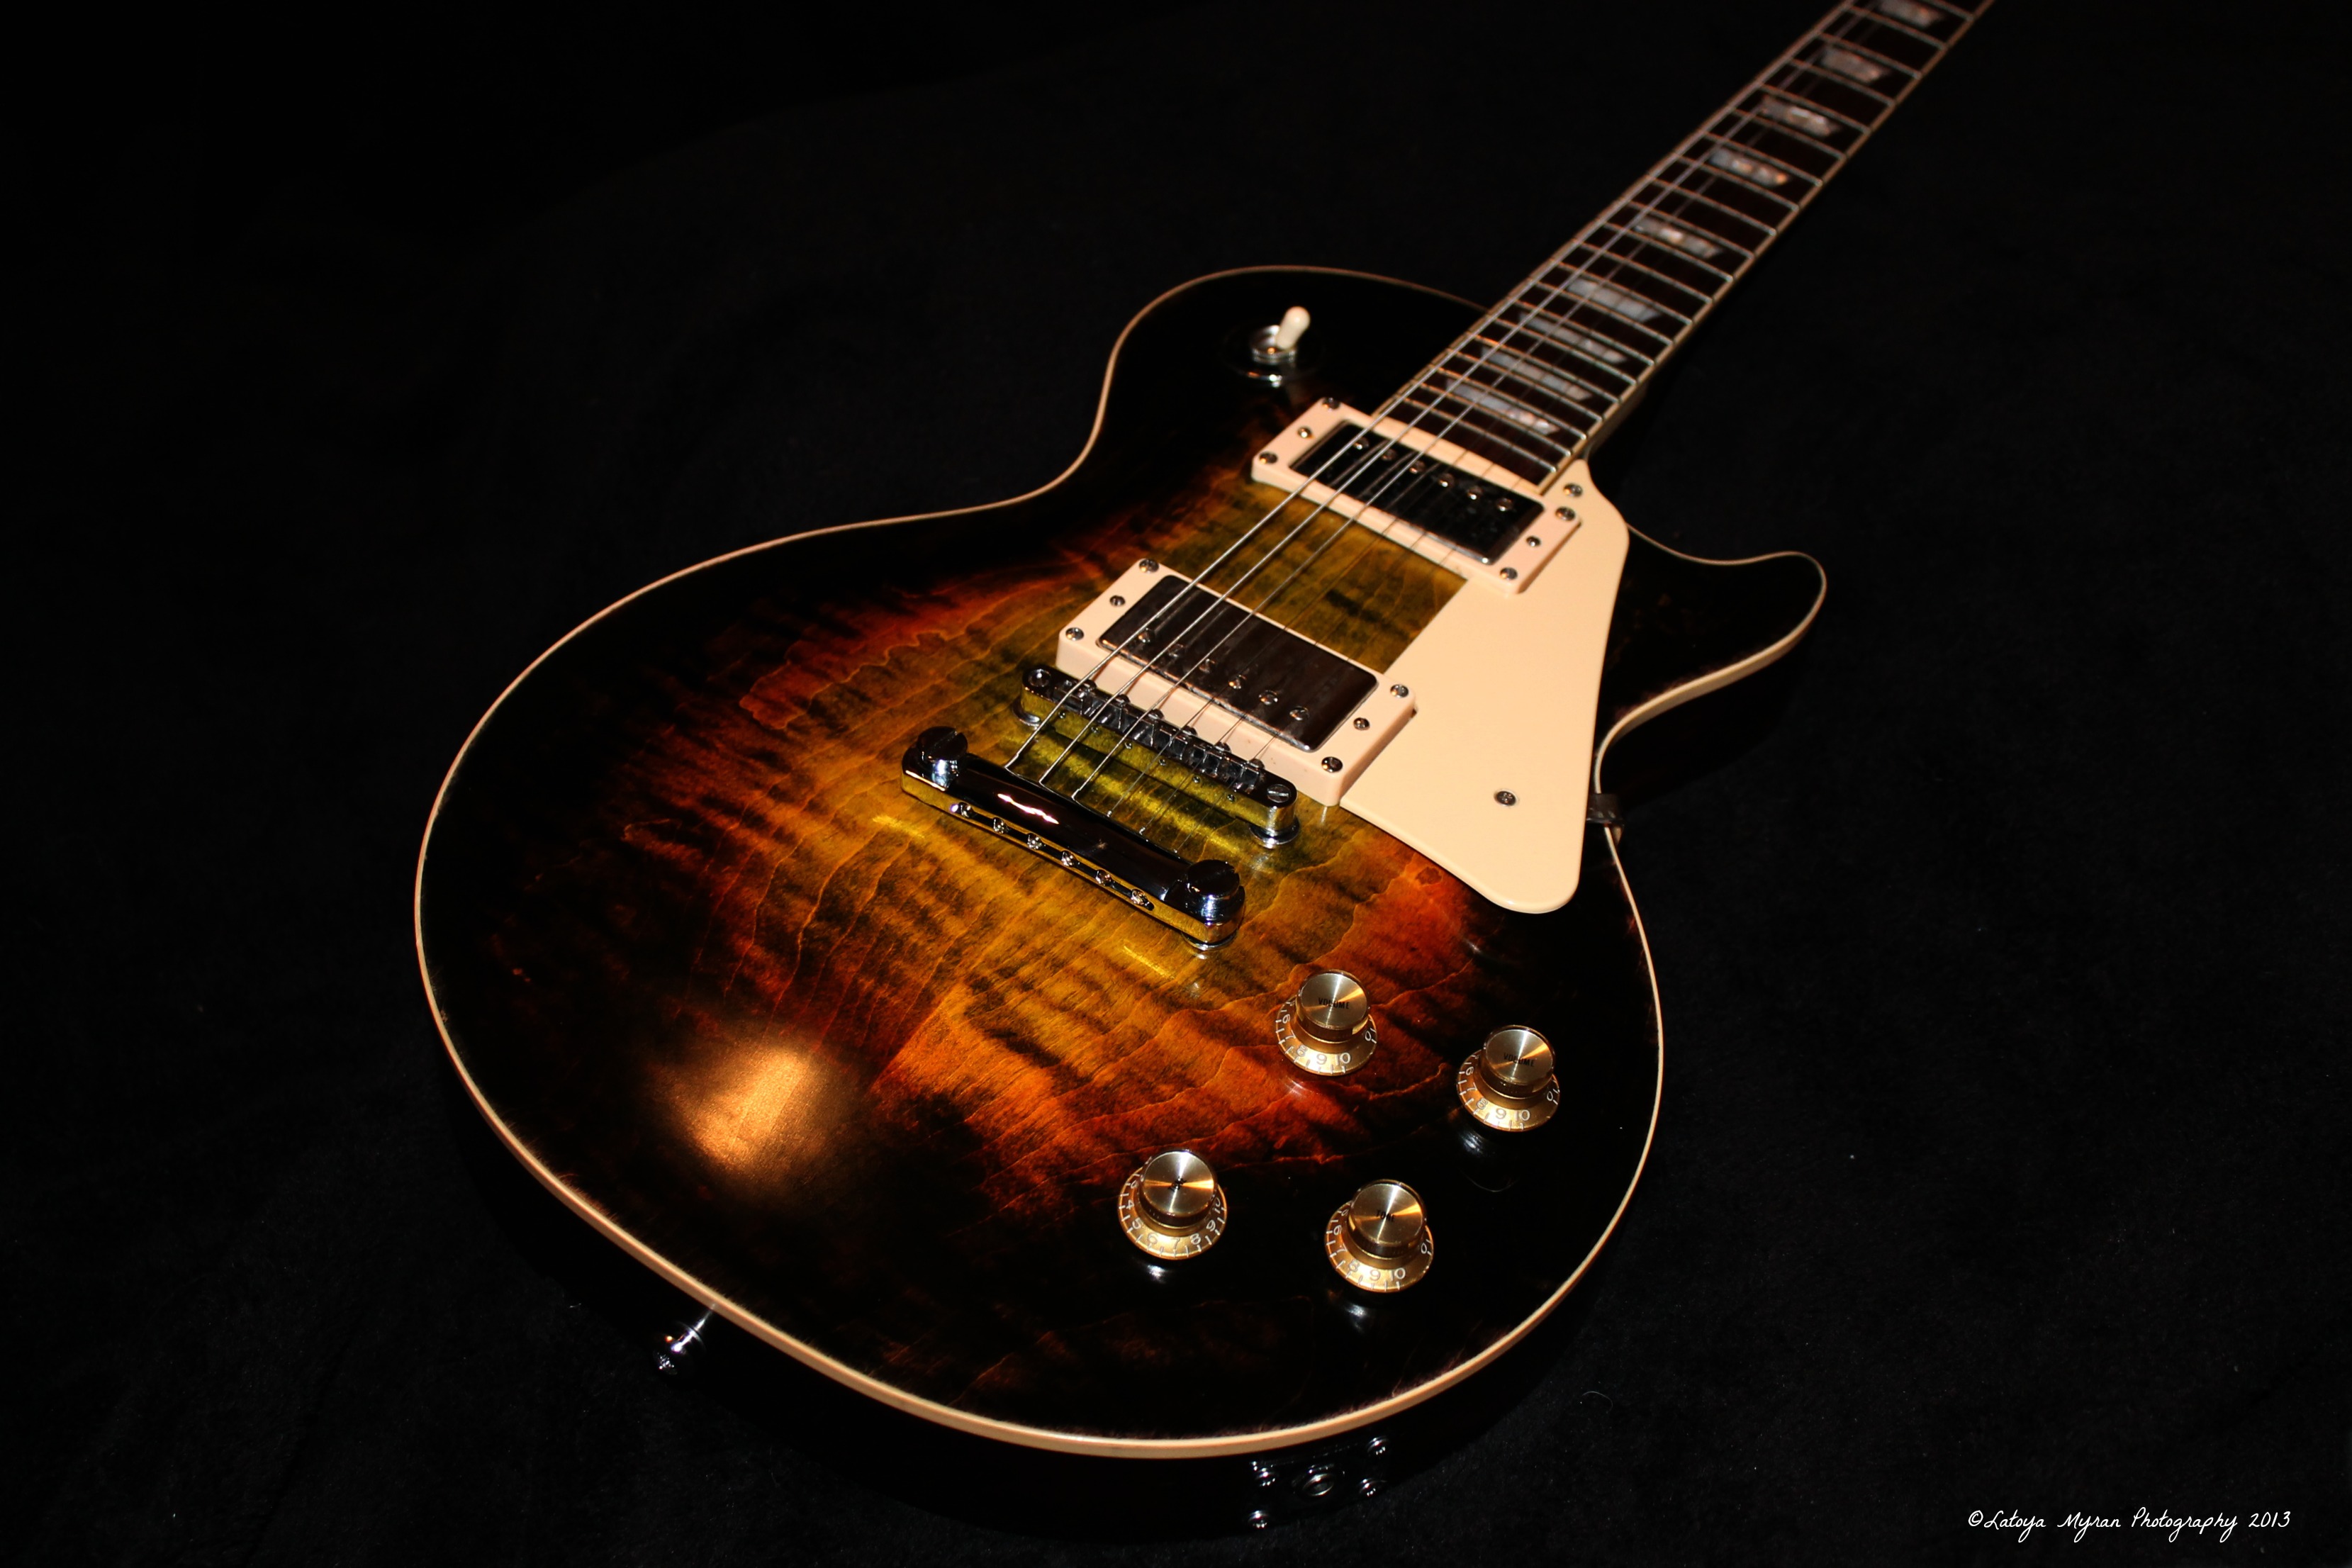
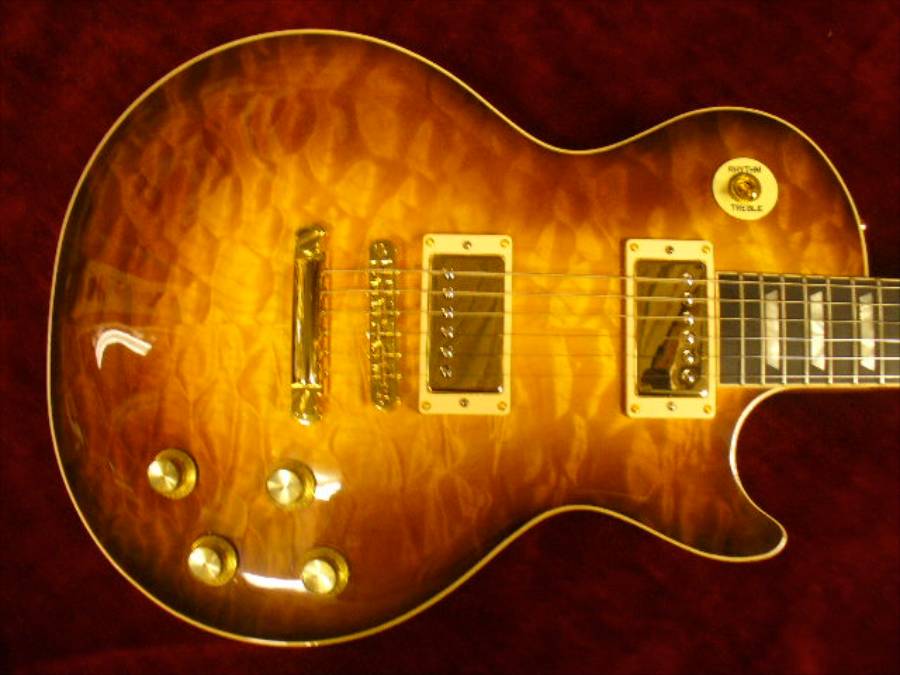
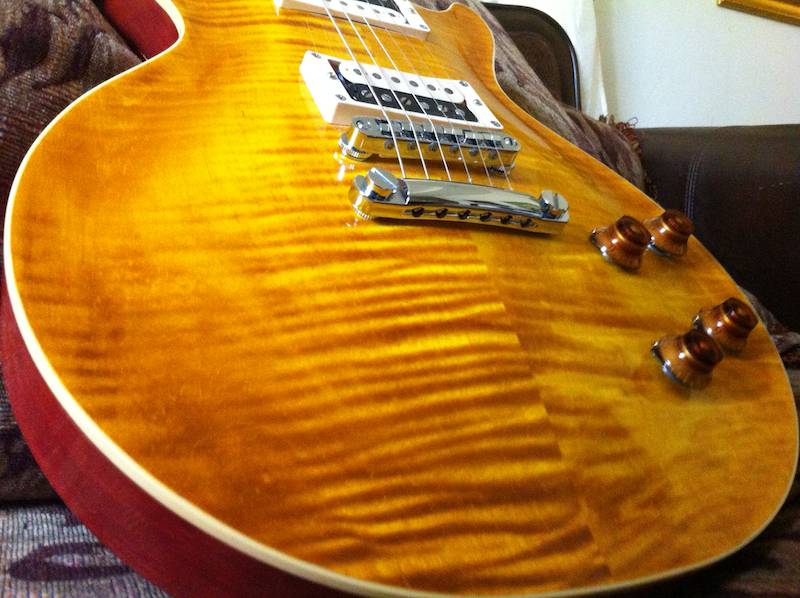
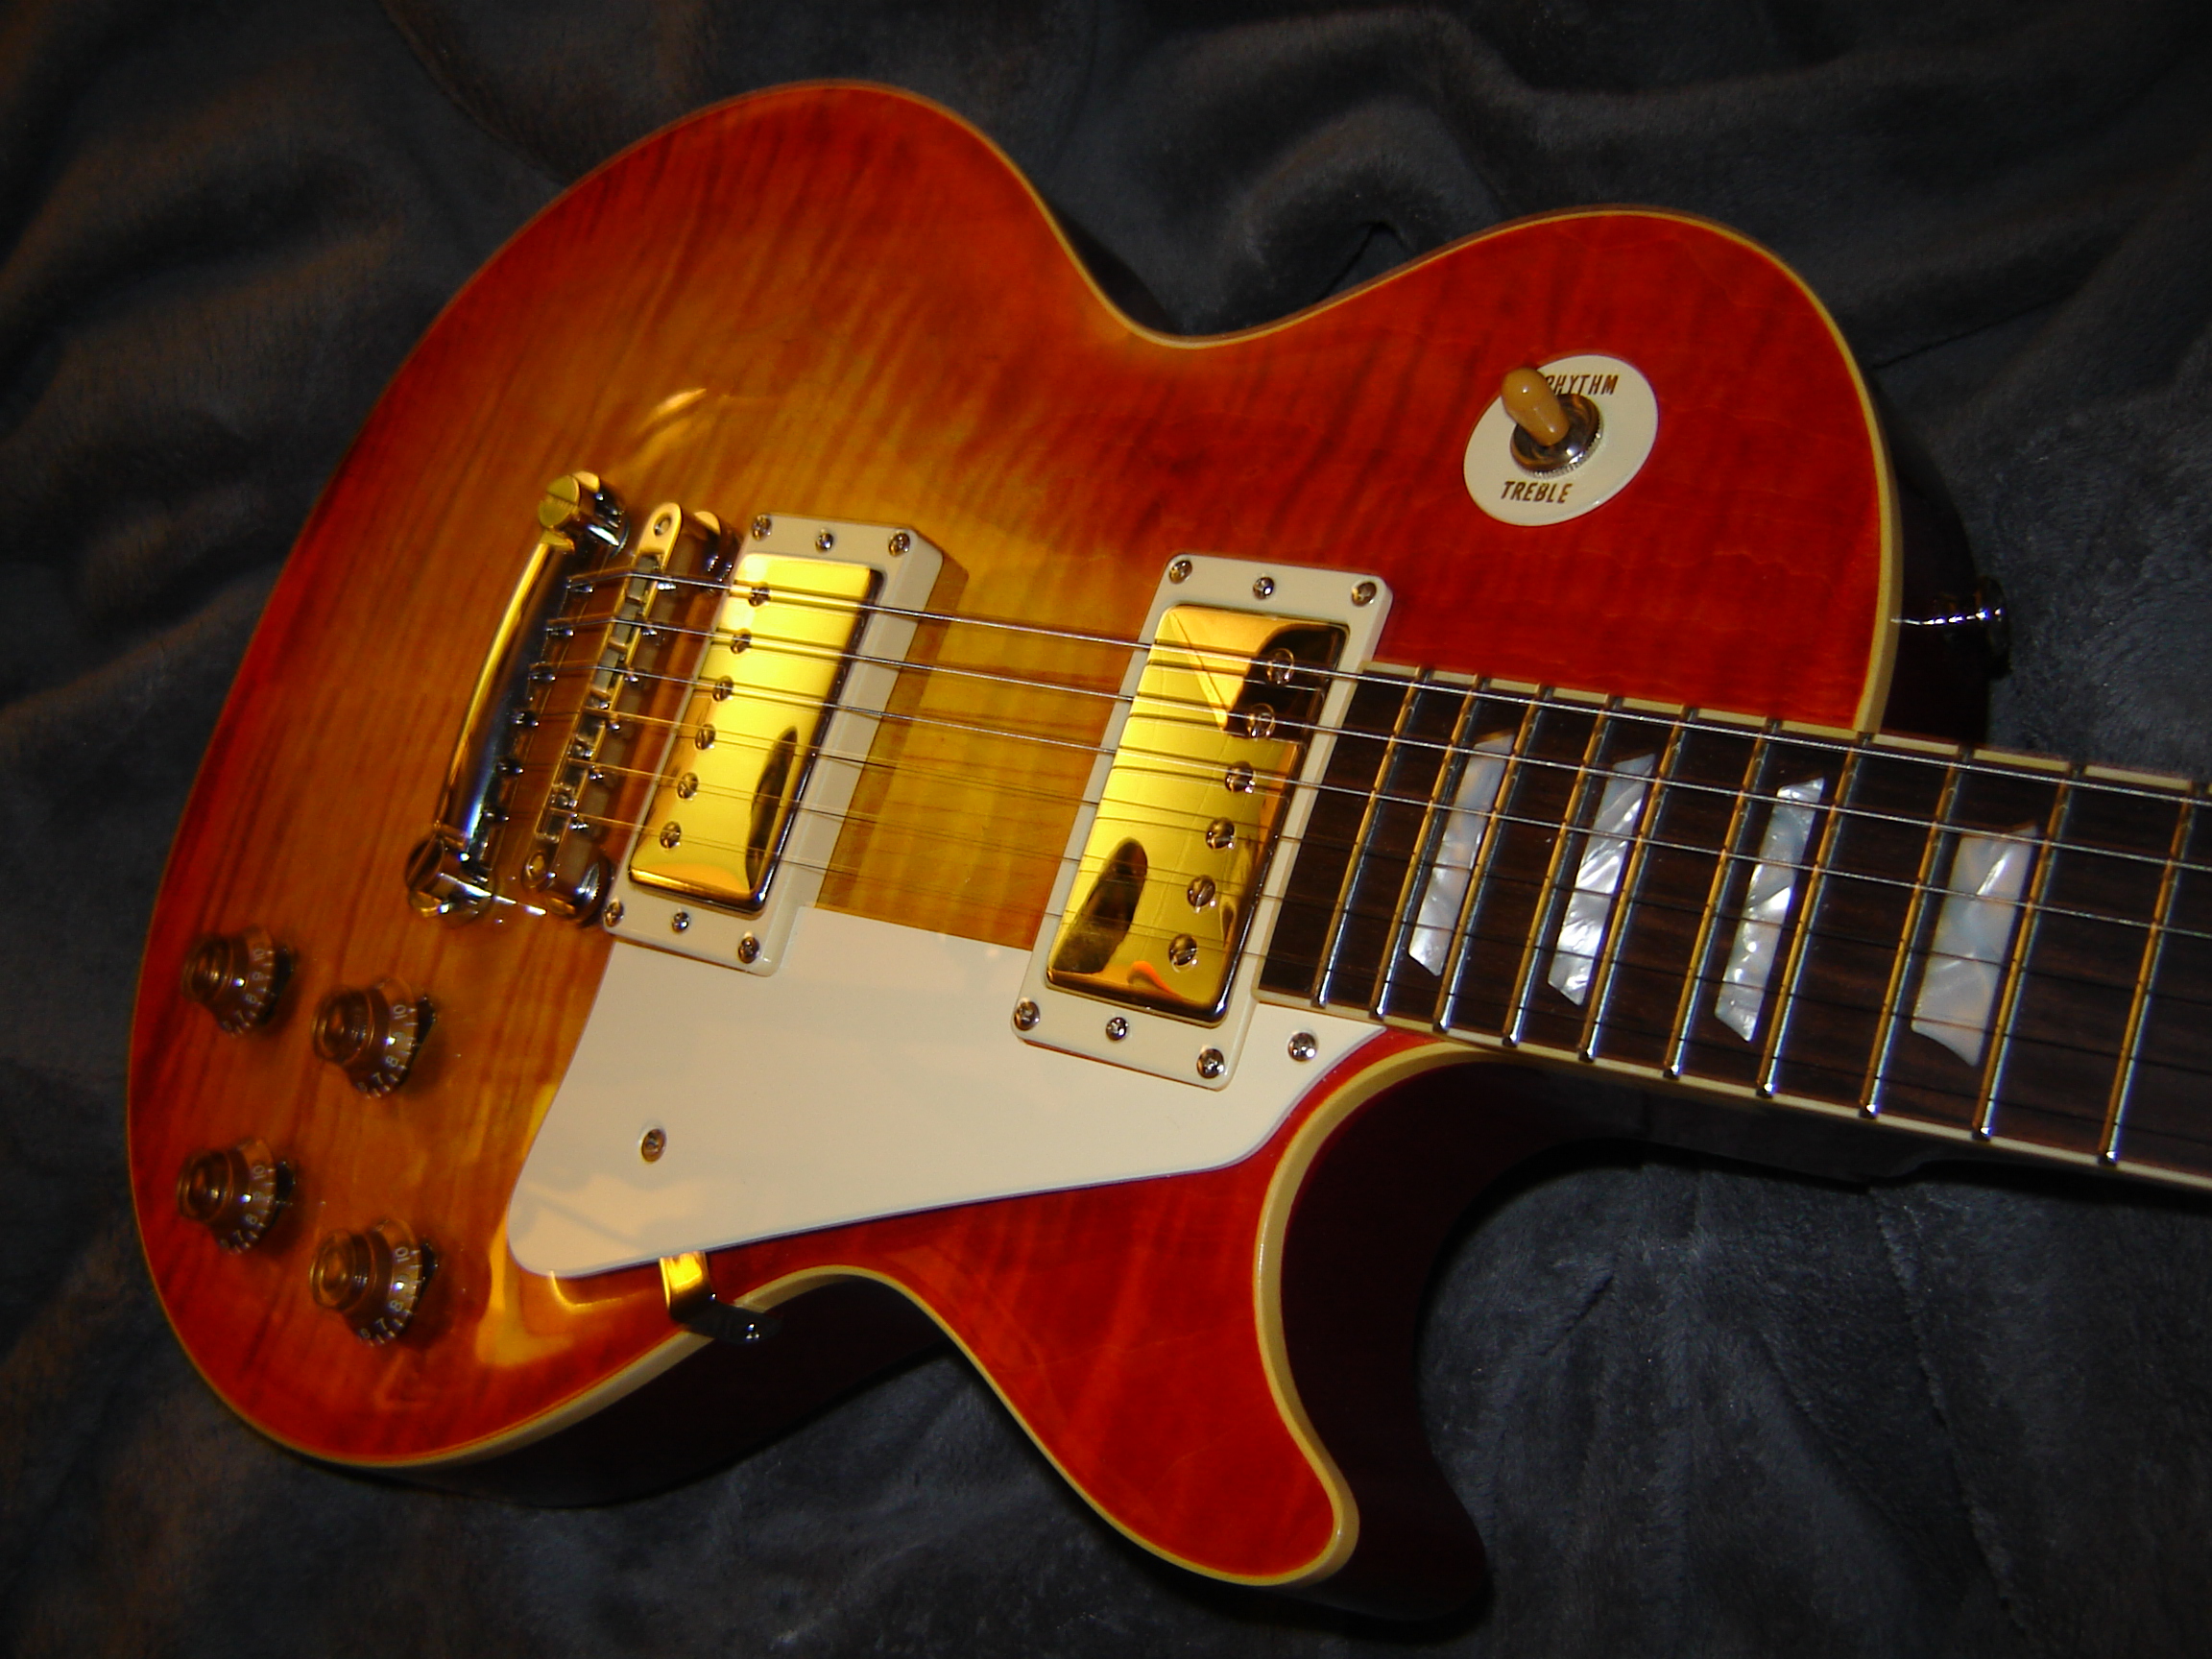
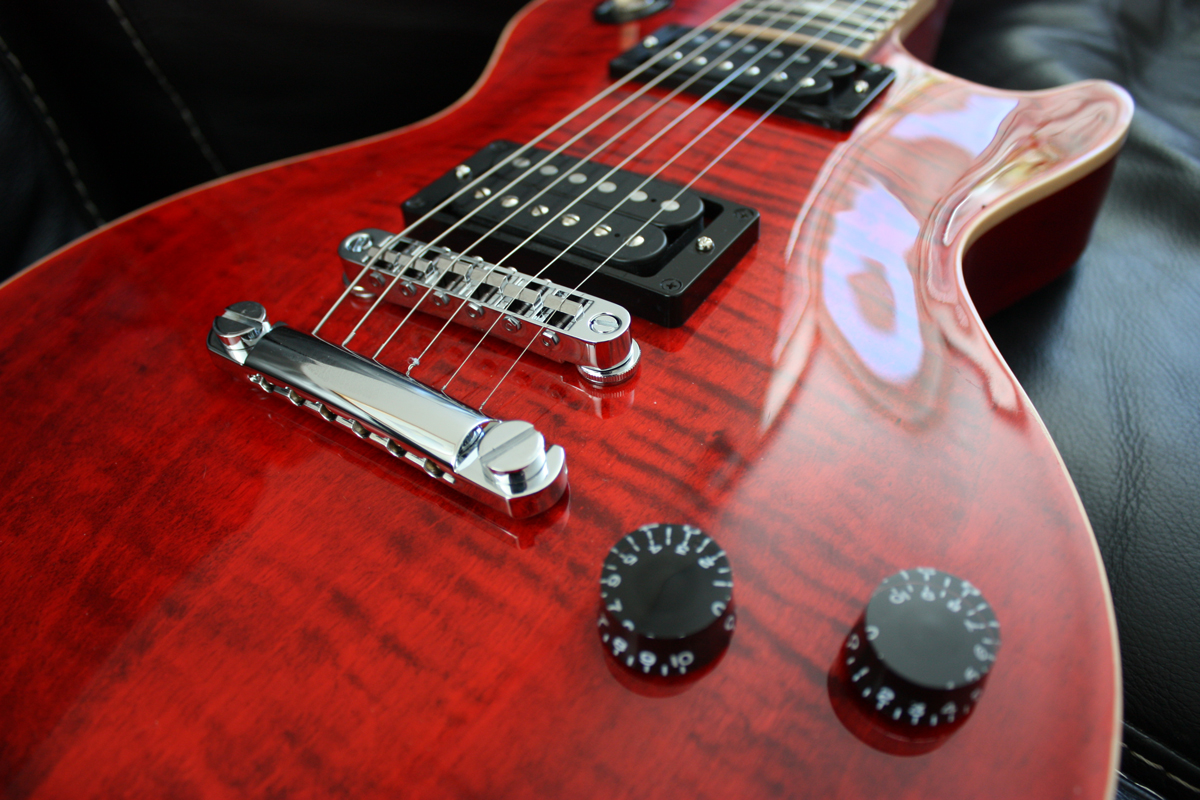
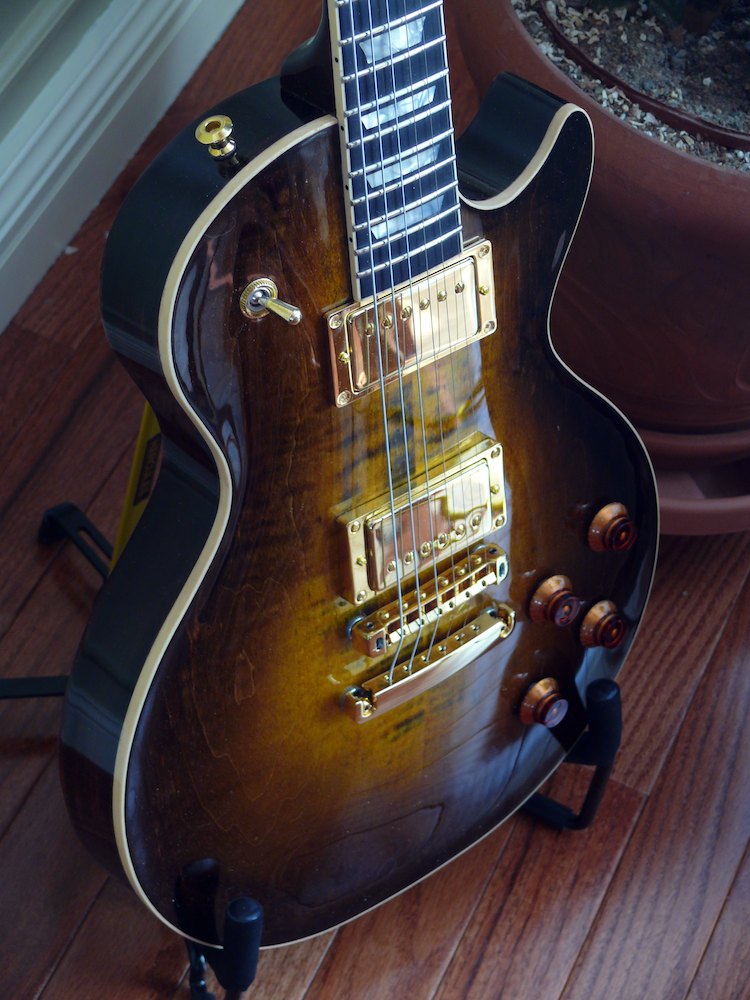
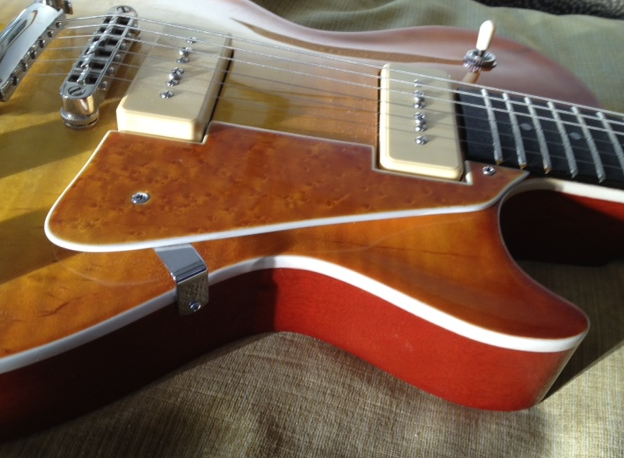
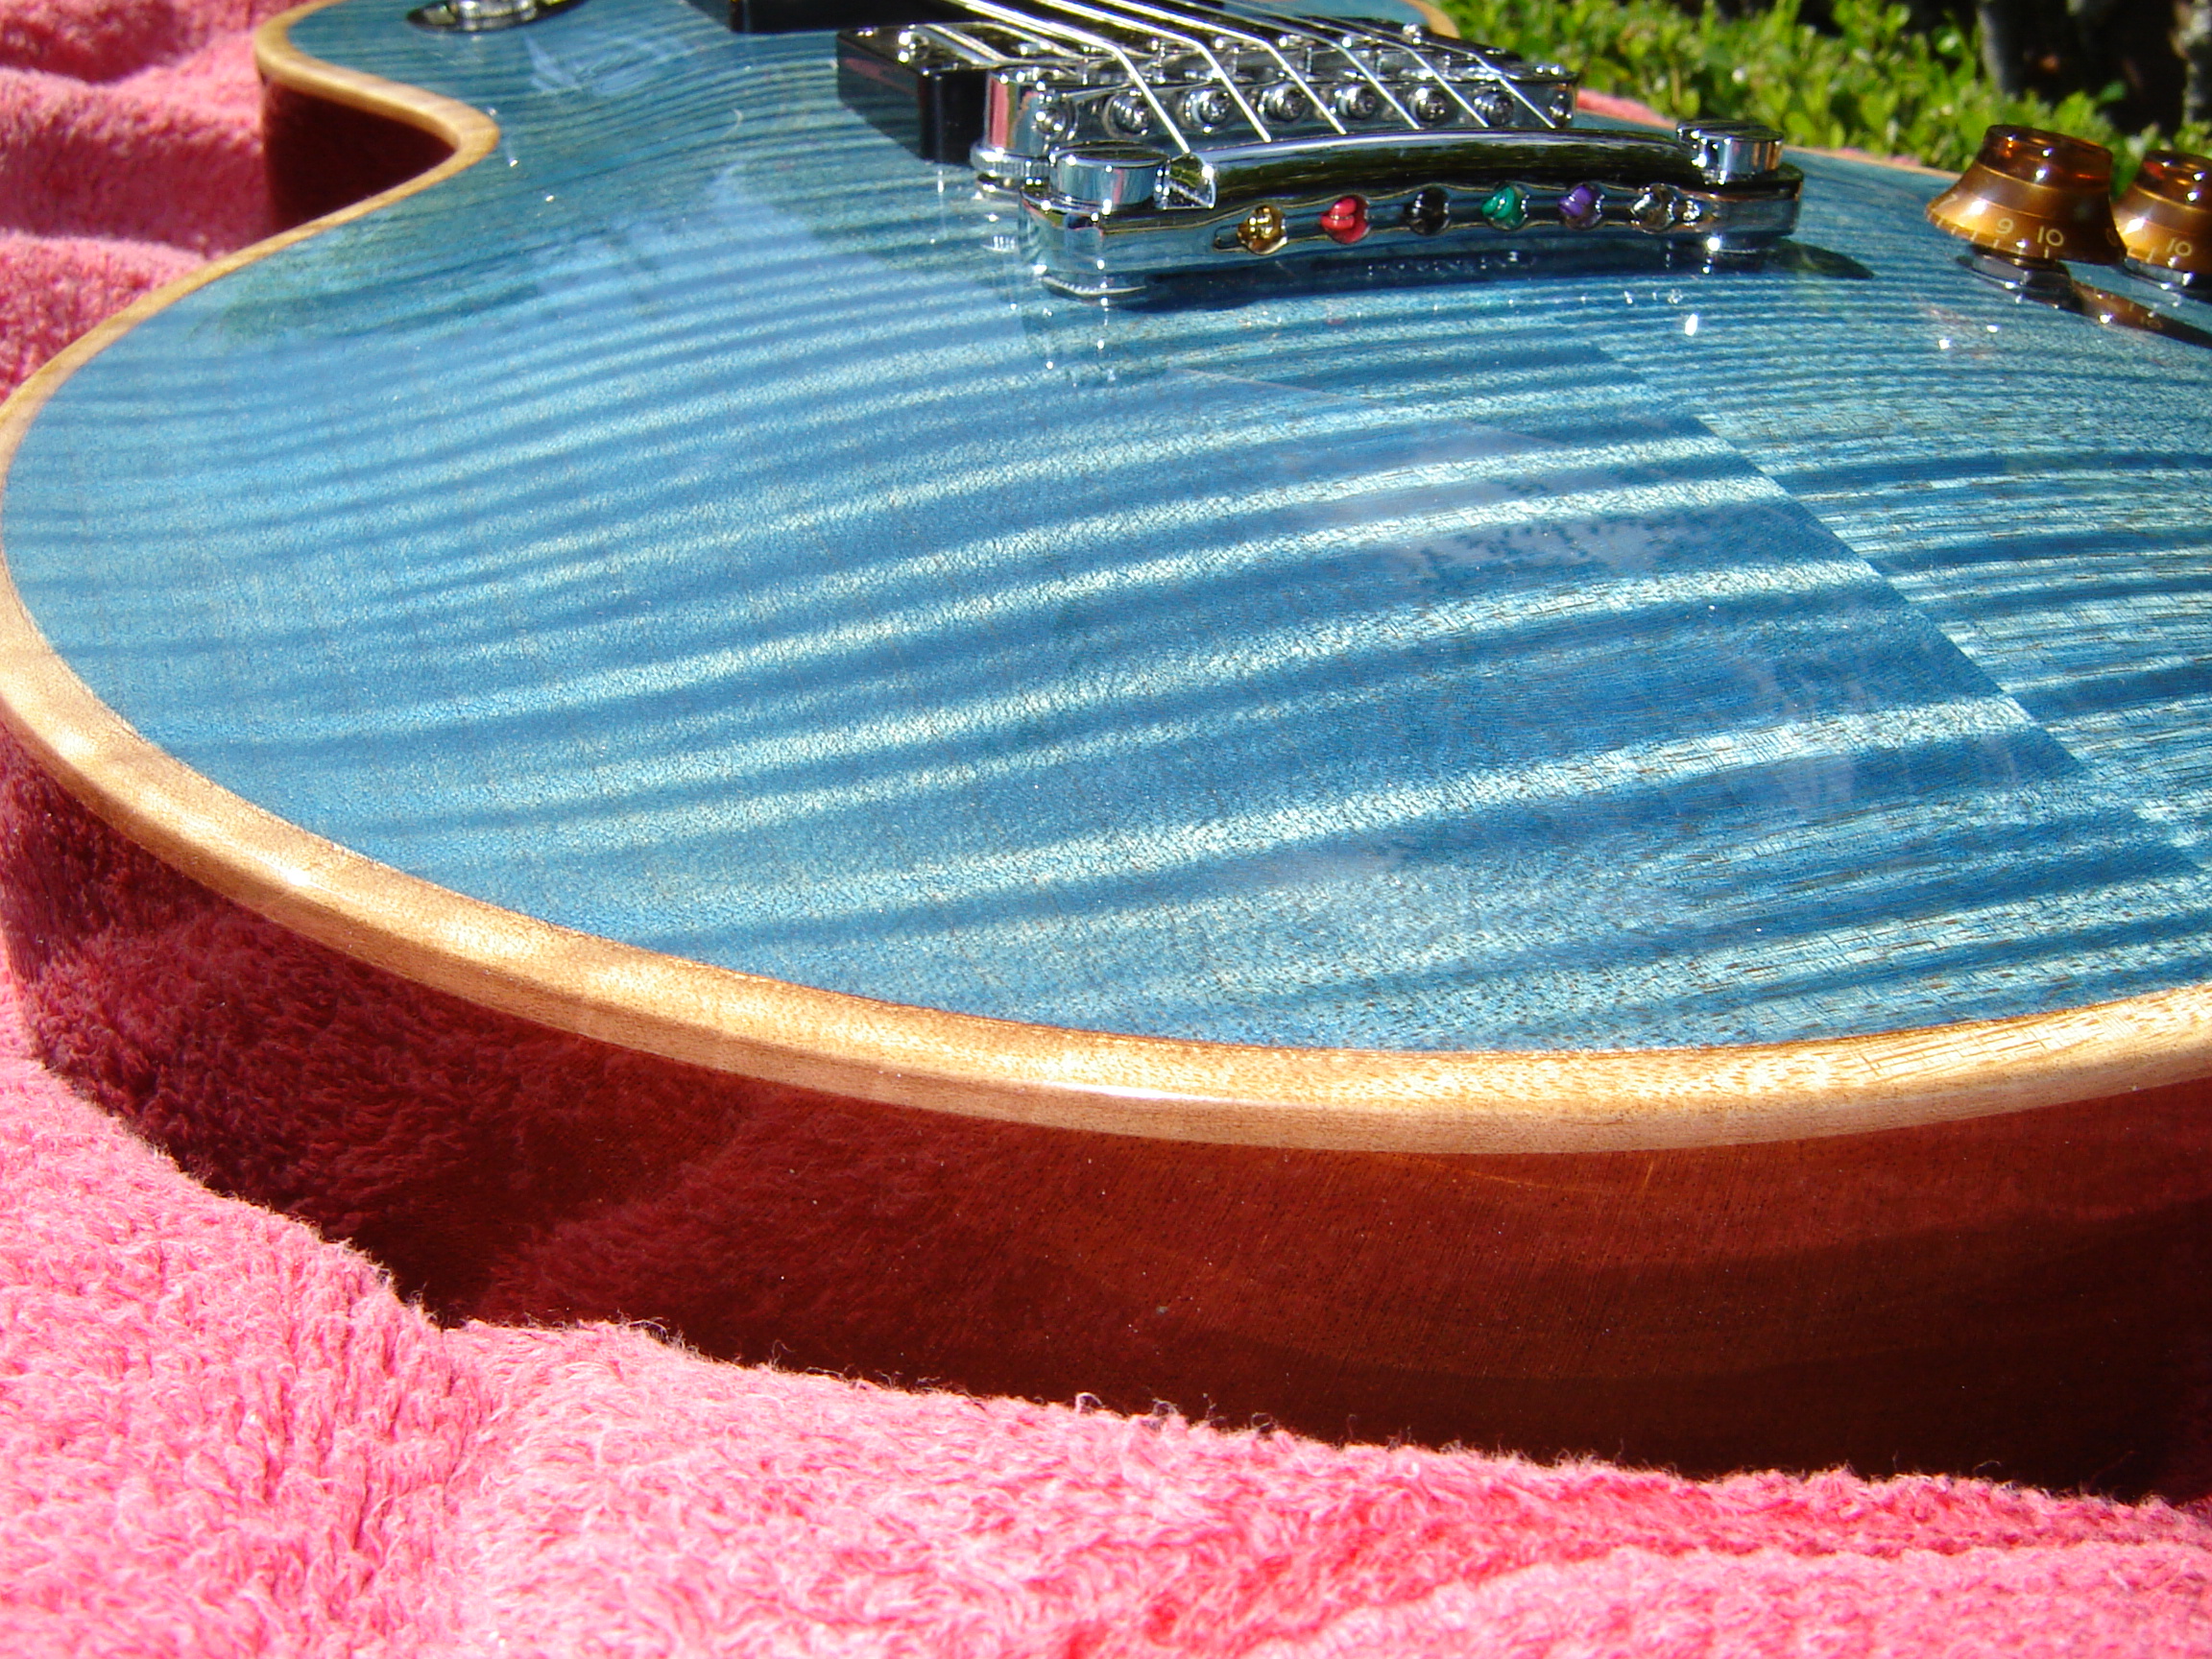
I bought a 59 carved top kit from you a little over 2 years ago and recently finished putting it together. So I thought I’d send you a few “finished” photos and also tell you how much I enjoyed both putting together the guitar and of course playing it! Your kit is absolutely top notch, with great construction but also really great wood. Thanks so much!
 
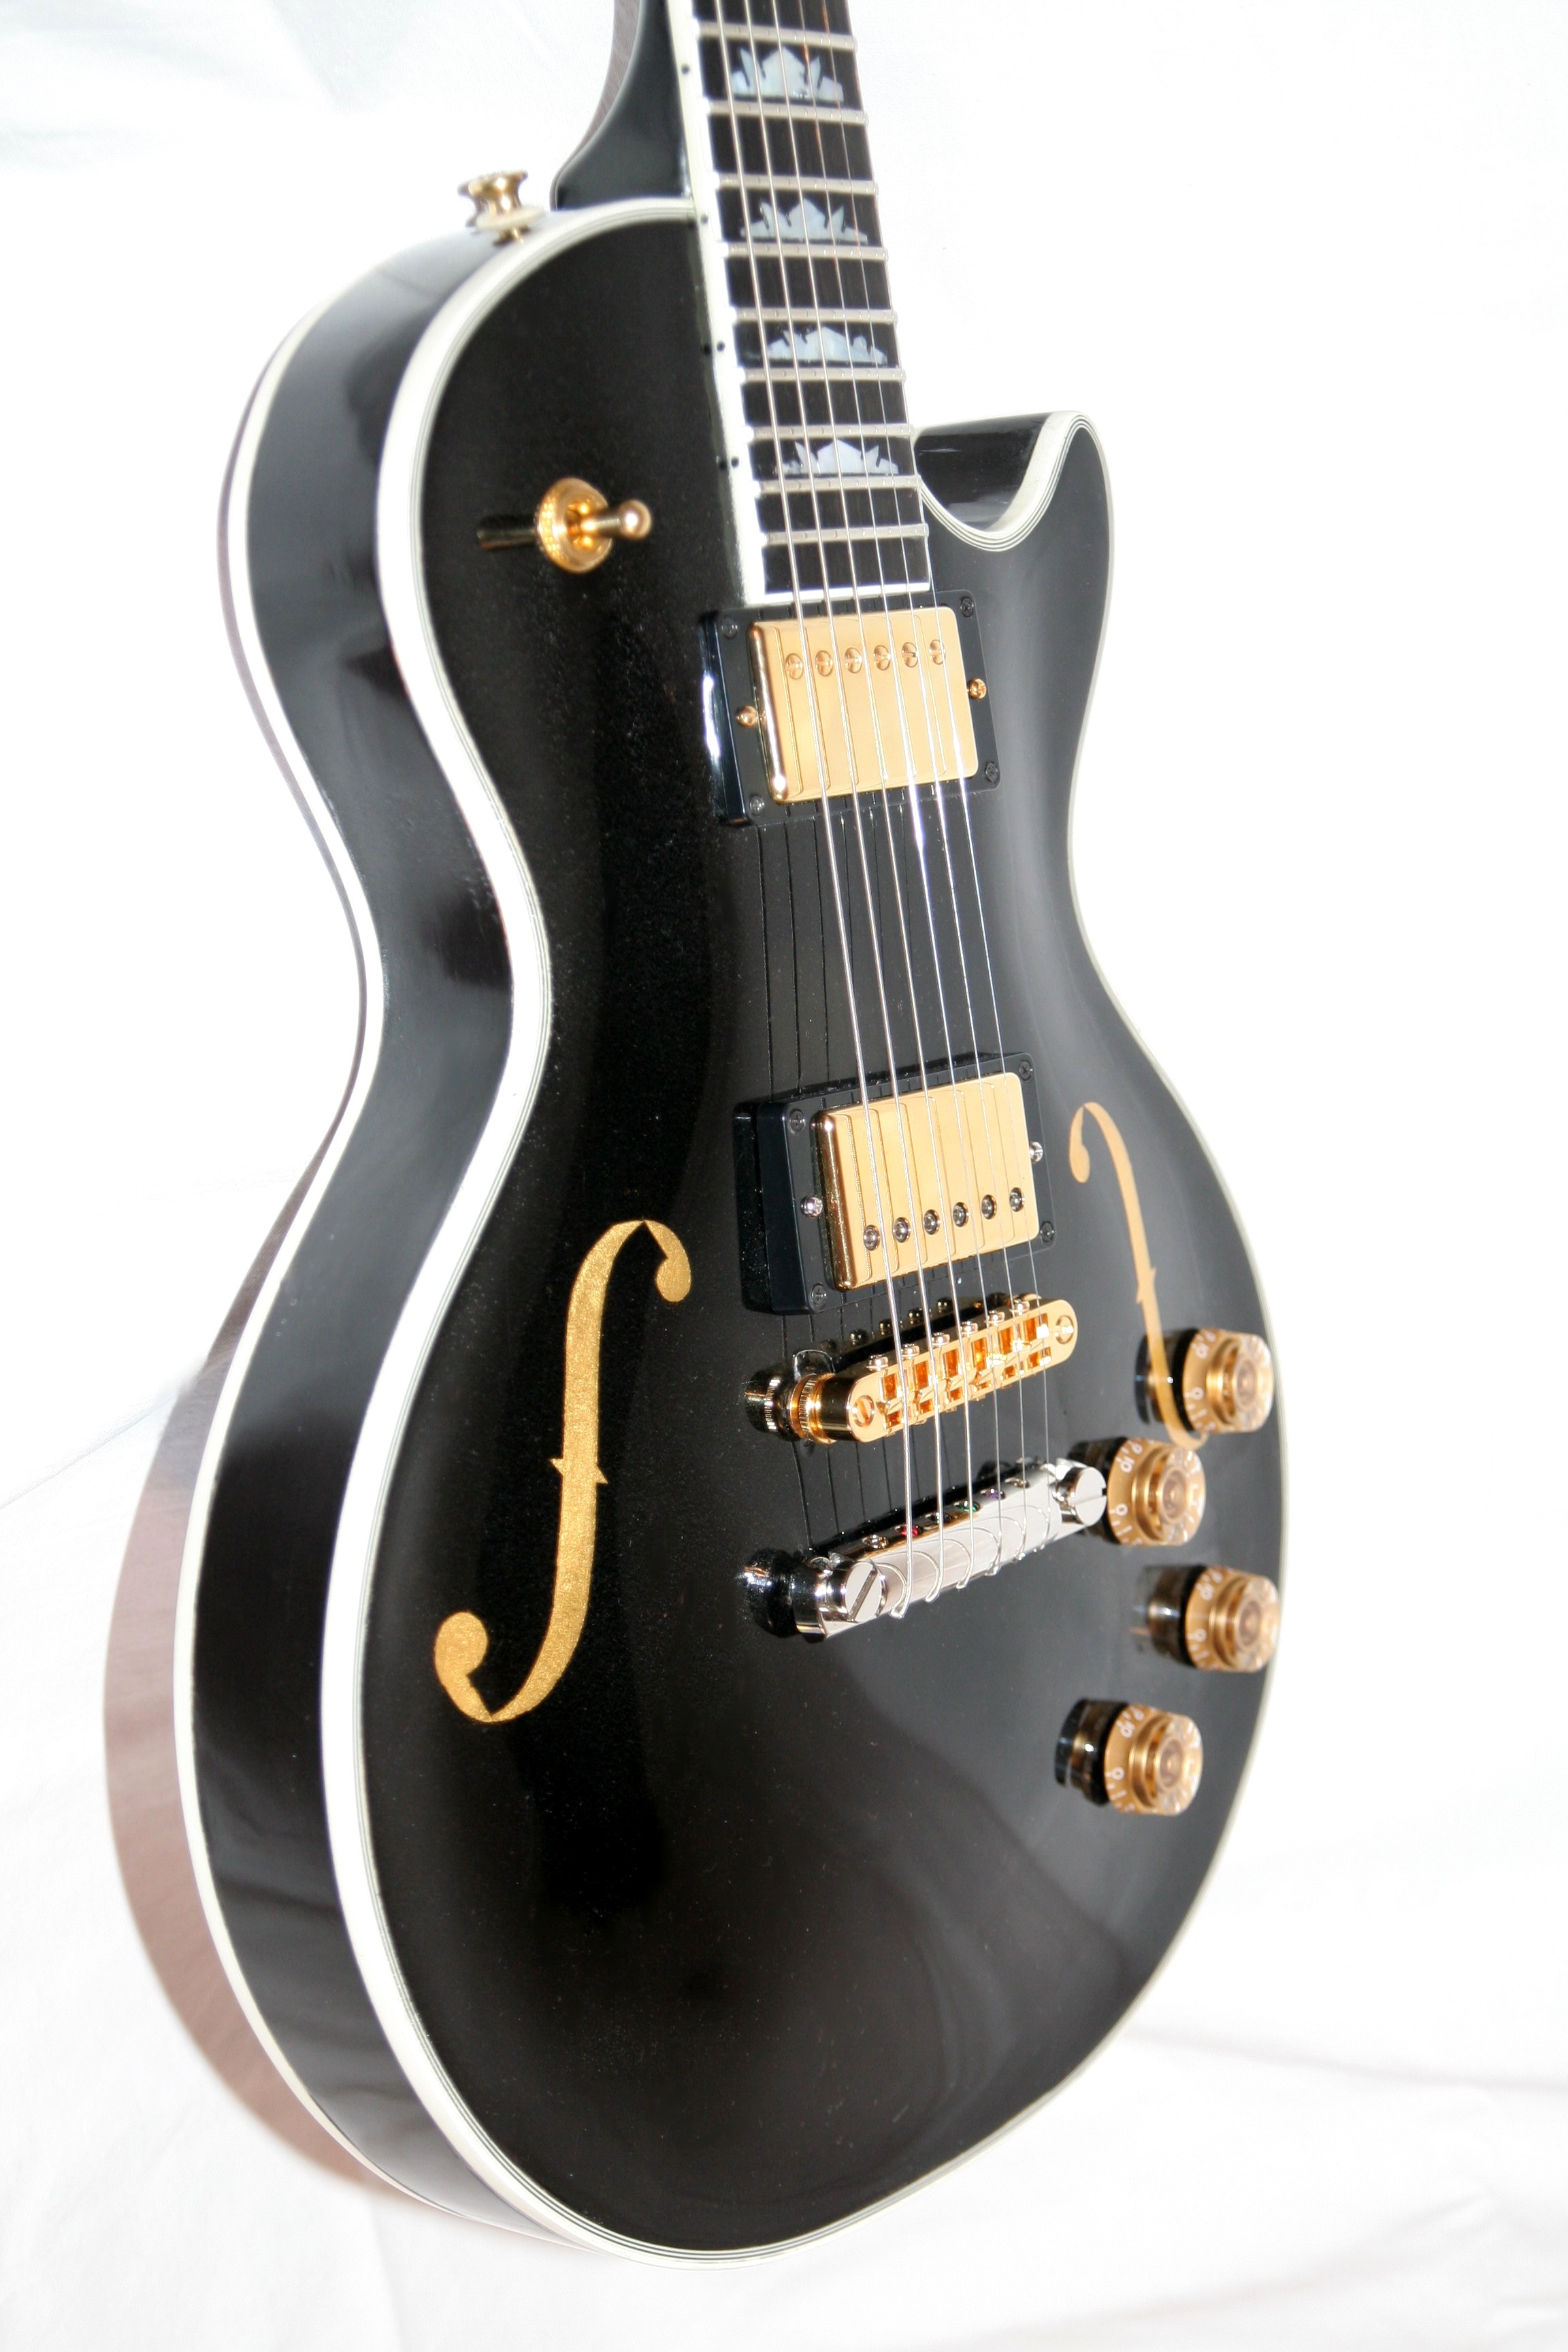
I did a french polish finish, with an aniline dye burst right onto the maple. I also added binding to the top and a custom inlay.
If you’re interested, I wrote about my whole build process here:
 
Here’s the full photo album:
 
Thanks!
Dave
 
Posted on

Clayton’s Most Glorious Creation


Can’t thank you enough. I worked on this everyday until I had to wait to buff the finish. It’s hard to put down now. It sounds way better than my other guitars, and plays a lot better too! The wood joints are extremely well cut, and wood quality is excellent , fret work is fantastic , fretboard inlays are very well made… very precise, and the extra jumbo frets makes playing this thing very fun, and easy.

I used colortone stain, mixed in alcohol , behlen nitro lacquer , Grover tuners, tonepros metric bridge and tailpiece set, zakk wylde emg pickup set and various other small parts. 

I can’t wait to build another one . Thank you again, and I will surely be back . 

                               Clayton.

Posted on

Charlie’s Drop Dead Gorgeous Burst

Hi Phil,
I am sending you some photos of my recent build.  I am very happy with the results because you provided me the best foundation to complete a great guitar.  The project was not rushed and took approximately eight months to complete.  I used a Faber bridge and aluminum tailpiece, S.D. Alnico Pro II pickups and vintage wiring with PIO caps. The finish is amber on the top and red mahogany on the back and neck. The Guitar feels and plays very well and is definitely one that will be used. This guitar sounds amazing!
Thank you!
Charlie
Posted on

Stephen’s Two Wonderful Cents Worth..

Best DIY Guitar Kits

This is just a damn cool interpretation. Guys like Stephen make us look good.. Check this one out closely.


I just finished my ’59 Les Paul project and I couldn’t be happier.  The neck/body fit was perfect!

The guitar feels and plays great.  The fretwork was fantastic.

I went with a Gretsch-style orange on the maple top and head, rosewood stain on the body and neck.  The neck was finished with Tru-oil, and the body with a gloss nitro finish.  The pickups are GFS Retrotron Liverpools.  Lastly, I added a black/white/black pick guard.  I call it my “Gretsch-Paul.”

Excellent neck and body.  Hope to build another soon!
Stephen Beckner of The Nanker Phelge
Charleston, WV
He Made it from this kit:
[items ids=”17″]
Posted on

From Singapore With Love….

I love this…
Hi Phil,
I have been to Precision Guitar Kit site for some time and I have been wowed by the kits you made and the beautiful pieces of art that these owners have turned them into.
I see beautiful classic guitars made and I thought to myself, it’s time for something brutal, heavy and something metal.I wanted something simple and started off with the single pickup kit. 
The neck, first thing first, off to Kentucky, USA for the inlay job. The trident cross and scythe inlay is a tribute to the Swedish metal band, Dissection. And the Phoenix on the body symbolizes Behemoth from Poland.

1st week of August, this kit reached the Singapore waters and I began sanding from 150 – 400 grit. Next it is 4 coats of sealer followed by more sanding, primer and even more sanding to make sure my finish is going to as smooth as glass. Pardon me, it’s blasphemy to some but there should not be any sign of wood grain on this guitar.It’s time for paint and my first with custom made-in-a-can polyurethane aerosol paint . The “Behemoth Phoenix” is not a vinyl nor sticker. It was sprayed on with a custom template. 
On the other hand, the “poetic” verses on the back was made with a thin vinyl. Yes it was deliberate to make it hard to read. The purpose was to make it mysterious and draws the curiosity of anyone who wants to know what’s written on the “wall”. Once both artworks were done, it was clear coated with Spraymax 2k. Spraying with 2k products have its pros and cons. Unlike lacquer, you cant add layers of clear coat without first sanding it lightly but the good thing is it cures in about 5 days! I stick to my favourite parts for this project. I have been using Sperzel locking tuners, Schaller strap lock, Switchcraft jack and Earvana compensated nut for a while. They are reliable and easy to work with. Something new for me would probably be the Graphtech Resomax wraparound bridge. It’s an uber sexy bridge with the ability to adjust the saddles for better accuracy on the intonation. I have also slowly but surely getting all my guitars on Bare Knuckle pickups. This guitar is loaded with the Black Hawk humbucker which the Bare Knuckle guys define – the pickup which has all the power and clarity of an active, with all the tone and dynamics of a passive. Balls to the walls, if you were to ask! And last but not least, to keep things simple… I have not got any pot on the guitar if you look closely. The pickup is wired directly to the input jack. Less is more for me. Playing extreme metal, all I want is to plug in and play.*No electrical tool is used in the finishing of this guitar. All spraying, sanding and buffing are done by hand with spray cans, a sanding block wrapped with sand papers and lint free cloths respectively.
Edward
He made it with this guitar:
[items ids=”4226″]
Posted on

The Blue Ribbon Band’s Newest Guitar Part 1

Here is another guy making our 59 carved top guitar look simply excellent..
The first kit that I tackled was your 59 Chambered, Bound, and Flamed kit.  I actually wrapped this one up sometime around April.  I’ve used this guitar nearly exclusively all summer, as I’ve been on the road with the Blue Ribbon Band gigging all across Midwest, USA.  This thing is my pride and joy and I couldn’t possibly be happier with how it performs.  I have somewhere in the neighborhood of forty electric guitars and I’d put this one on the top of the pile.  If my house was burning down, I’d grab this thing right after the kid.  It really is my most prized possession.  Here is the list of components:
  • 59 PAF Duncan’s
  • Grover Machine Heads
  • Gibson Pots
  • Gibson Top Hat Knobs
  • Vintage Bumble Bee PIO Caps
  • Truss Rod Cover/Poker Chip from Hell Guitars Japan
  • Tusq Graphite Nut
  • Vintage Cloth Wiring
  • TuneOmatic Bridge
  • Bursted with Leather Dye
  • Finished with Tru Oil
  • Custom Headstock Inlay cut by Tulsah, Canada


Pictures of our 59 Carved Top Historic Kits all done up right..
He made it with this guitar:
[items ids=”3584″]
Posted on

Phil’s Beautiful Quilt

This is yet another Phil.. It’s one of our client’s from New Zealand who wanted to build a special guitar for his daughter. Well we did indeed to that… take a look at this how the quilt, underneath a honey stain just popped.

I did the stain and clear coat and I’m thinking I can do more like this. Anyways.. here are his words:

Hi Phil,

Guitar is together, sounds and looks fantastic. Check out Facebook “weta guitars guitar repairs”

They have heaps of photos and state precision as a highly recommended kit, they were really impressed.

If you have any trouble pulling photos I can get them from weta and send, Sharna is really pleased so a very positive experience all round.

Kind regards,

Phil B

[items ids=”1474″]

Posted on

Hawaiian Ryan’s – maika’i loa

maika’i loa is hawaiian for excellent and man oh man it is.

Aloha Phil!!

Well, I finally finished my project based off of your kit.

I decided to do this project as a relic, both because I wanted to try different aging techniques, and because the price of aged guitars has gone through the roof!!  It was really fun to do, but taking the first “cut” into the nicely finished guitar was a bit nerve wracking.  Now that it’s done, I love the feel.

I started with Stewart-MacDonald nitrocellulose lacquer spray cans.  Ever since I first saw Tom Wheeler’s “American Guitars”, I wanted a cherry sunburst that looked like the guitar on the cover of that book.  I later came to find that that finish is called “Brockburst”.  Over the amber, I had to sunburst a mix of cherry, red mahogany and tobacco brown, sprayed over each other.  I was really happy with the results.

Next I did some checking with a razor, and also used compressed air to chill the finish.  For the exposed maple top I used an aging trick involving tea and vinegar.  For the aged mahogany I used stains, over which I applied gunstock oil and wax.

I still need to age the inlays and the pickup covers a little more, but overall I love this guitar.  The quality of your kits are top notch, and I would put it up against any similar styled guitars made by any manufacturer.

Ryan I
Hawaii

Posted on

Francesco’s Roma Extraodinair..ah!

This is one of our kits that ended up in the skilled hands of a doctor in Italy..


Hello Phil,

I hope all is well. I would like to thank you again for the amazing kit you provided. The pieces were flawless and beautifully resonating before assembly, and all routes and fits were absolutely perfect. I looked around for several weeks before choosing where to buy the bones for my Les Paul, and the kit I received confirmed your internet fame: you guys provide the best parts available to build a top-quality guitar.

As you can see from the pictures I didn’t want to settle for anything less than an amazing guitar. I went for the best and most beautiful guitar I could think of.

I started from your LP59 kit with a blank ebony fretboard (only slots) and front/back binding routes. Then I did all the rest. The fret markers are hand-cut in mother-of-pearl with a dremel-type tool, and inlayed with carving knives. The 12th fret has my last name engraved in the mother-of-pearl. The body and neck are both bound; doing the body 5-ply binding was pretty tricky. The body is dyed black with ColorTone color. Then on top of that I sprayed one very thin layer of nitrocellulose lacquer to prevent smearing and I did all the decorating stencils (including signature) to lay the 24carat gold-leaf I bought. The finish on top of that is multiple layers of nitrocellulose laquer.

The parts I used were again the best I could think of: grover locking tuners, bone nut, Dunlop jumbo frets, tune-o-matic bridge, aluminum stopbar tailpiece for tone, 500s Gibson pots and bumblebee caps. The pickups are a Gibson ’57 classic at the neck and a Seymour-Duncan antiquity at the bridge. I made sure the electronics very well grounded, isolated and soldered.

The sound is amazing, gonna send you a video soon. It  is rich of harmonics, round and with huge sustain. I went to Guitar World and compared it to multiple-thousand-dollar and my guitar fell short of no others.

Keep up the excellent work, and keep all those guitar-builders out there dreaming!

Ciao!

Francesco.

Posted on

Schluggo riding proud…”This guitar sounds like no other I own”


This is a fellow who lives in my neck of the woods. Great guy. So this is his first build… take a look at what an awesome instrument you can make.

Tims Lucky Mojo

This was my first build and I have learned a lot. I knew nothing about finishing and had lots of questions and apprehension. But now that I have the finished product in my hands I am very pleased. This guitar sounds like no other I own and I am discovering how much more I like it every day I play it, especially at rehearsals. My expectations were high and this guitar turned out just as I had hoped. After educating myself on guitar finishing I got busy and started experimenting with stain colour on scrap maple and mahogany that Phil gave me. I made lots of minor errors but eventually got what I was after.

Most importantly the neck and body fit together perfectly. The pre cut angle on the neck leaves no room for errors,so you cant screw this up. This was the easiest part of the build.

I then gave it a shot of vinyl sealer,sanded, then clear coats of nitro lacquer. I  waited the recommended 4 weeks before I sanded and polished. This was the hardest part of the build.

In the meantime I chose the gear I wanted and ordered the parts online.I ordered from a few different companies as I could not get everything I wanted at one company.

  • Sperzal locking tuners
  • Graph Tech nut
  • Seymour Duncan Alnico II neck
  • Seymour Duncan Alnico II  Slash model {a few extra windings } bridge
  • Tone pro bridge and tailpiece {supplied by Phil }
  • 500 k pots ,orange drop caps
  • Covers knobs and colour to my taste

It was very exciting to polish this baby up and see the work that I did pay off.

Assembly was for the most part easy. It just got better and better, I would stand back and marvel as I put the parts on one by one.

Time to do the nut and I blew it. I sanded too far in pursuit of the perfect action. The next one was easier and I got it just right. I set the bridge low and got no buzz as I checked up the neck. No adjustments needed on the truss rod.Could it be this easy I thought?  Oh ya intonation!   I checked the intonation and to my surprise it was right there.Wow I was done

Right away you could hear this guitar had tones like no other and as I used it exclusively for the next week at rehearsal ,it was hard to keep the shit eating grin off my face. My band mates are impressed with the quality and sound ,and that it is unique.

I will defiantly be looking forward to building another kit. I think it will be far easier as I have all the supplies and knowledge from the first.


This is what he bought:

59 Carved Top | Our Best Seller

Posted on

Honduran Beauty, Mena…

Well, this is a guitar kit that we sold to DR. Sergio in Honduras.. Take a look at what he did with our Bound & Flamed kit

Here’s what he did and used:

Hi Phil!just wanted to thank you guys, I’d just finished my guitar, named MENA after my daughter, and I think it came out pretty good, it’s a beautiful sounding instrument.

It took me a little over a month to finish this project, and I’m very happy with the results.

for those who may be interested, here are the specifications:

1. 59 carved top bound and flamed (precision guitar kit).

2. Amber and lemon yellow dye for the top (Stew Mac).

3. Deep mahogany stain and finish for the back (ace).

4. Black and clear gloss polyurethane (ace).

5. Grover deluxe tuners.

6. Bone nut (Stew Mac).

7. Gotoh bridge an tail piece.

8, Gibson 57’s Classic and Classic plus neck and bridge.

9. Cts pots 500k, switchcraft switches, mojotone vitamin t caps 0.22 mf.

10. Chrome jackplate.

11. Gibson nickel strap buttons.

11. Amber switch tip and knobs.

Again thank you very much!, you will be hearing from me soon!

Oh!, and sorry for the pictures, they are from my Iphone.

and this is the kit he used:

Bound & Flamed…

Posted on

Greg’s Burst of Sun…

make your own sunburst guitar
Phil,   I was extremely pleased with the ’59 Bound & Flamed kit I received.  The neck/body joint was perfect, and gluing it in place was the easiest part of the process.  As you can see I opted for a classic cherry sunburst look.  I am also extremely pleased with the playability, every now and then a guitar can seem to almost play itself very easily, that’s the feeling I get with this guitar.  Thanks for a great product, thinking about my next project.

and a bit more..

Hardware is all nickel plated, Faber bridge, Gotoh aluminum tailpiece, tuners are Kluson copies, pu’s are Stewmac’s Parsons Street (which seem fine, but I had in mind to try some other boutiquish humbucker types eventually).

I really like the plastic I got from Philadelphia Luthier Supply – more of a bonewhite than pinkish cream, I think it looks perfect on the red and contrasts a bit with the more yellowish binding.

The burst top I did with Reranch powder stains hand-applied, 3 colors; started with amber over all, sanded that back to leave an amber overtone in the grain recesses, then applied cherry on the edge, then yellow in the middle – with a lot of spot sanding, touching up and blending the stain here and there with Q-tips.

I grain-filled the mahogany with marine epoxy, the color for neck and back was Reranch cherry spray.  12 coats of nitro clear over all of it (fingerboard taped of course), wetsanded and polished.  I’ve done numerous solid color and translucent Fender style bodies before so I already had the basic process in mind, this was my first sunburst.

BTW, my “paint station” consisted of a bungee cord on a tree limb from which I hung the body for spraying, I’ll send you a pic of that later.

Also, gotta say I admire your business model; if somebody can’t glue that neck and body together – they shouldn’t be trying this.  Shipping body and neck unassembled must lower the shipping damage risk (versus a full length guitar), make shipping cheaper, and lessen the likelihood of theft, plus it lets the owner say “I built it”, awesome!

Posted on

Peter’s Cherry Red Swedish Sunset

Good morning Phil.

As promised, here are some pictures on my Kit I bought end of  ast year.

The progress:

  •  I started to dye the body black, sanded it down to make the flames more visual.
  • I tinted the nitro cellulous lacquer with cherry red dye and shot 4-5 layers.
  • Clear coat nitro cellulous around 40 layers, sanded with 800 grit every 5th layer until the last layer which I wet sanded 800 grit, 1200 grit and finally 2000 grit.
  • Then I polished with Meguiars ULTIMATE COMPOUND and waxed it with Meguiars ULTIMATE LIQUID WAX

Hardware:

  •   Bridge and Tailpiece:  TonePros system 2Tuners:
  • Grover Roto-Grip Locking Rotomatics (502 Series)
  • Pickups: Dimarzio Transition (Steve Lukather new signature pickups
  • Nut: Gibson original bone
  • Plastics: Gibson original parts (Bellplate, Volume/tone knobs etc)
  • Electronics: RSG kit with CTS pots, RS Paper and Oil GuitarCap by Jensen, 3-way toggle switch Switchcraft.
  •  Dunlop Straplock system
  • Strings: SIT Power Wound 009-046

It took me some time to get the color as I wanted, in the beginning I dyed the body red but for some reason it turned into brown after a couple of days, think I sanded it down 2 times. This happened twice and therefor I decided to tint the Nitro and that turned out really good.

I like when the color is “sharp” and both the grain and color pops.

Give also Kevin my best regards and once again Thank you very much for top notch body and neck. It wouldn’t be possible to get so good end result without your craftsmanship!


Posted on

John’s Queen Bee Sting…

Body, front – Wood figure highlighted in Black and sanded back – Amber base with Brown to Black fade dye (sprayed)
Body, back – Dark Mahogany dye, shellac basecoat, filled and sanded
– all colors Trans-tint alcohol based dye – 12+ coats clear lacquer

Neck – Mahogany stain, filled sanded, Tung Oil approx 12 coats
Headstock – Black Lacquer, laser engraved Bee Hieroglyph design approx. 3/64 deep filled with yellow water based artists acrylic, 10 coats clear lacquer

Percision’s drop-in pro wiring kit, Schaller locking tuners, Gotoh 510 bridge & tail, Fuelie Pro Mod pickups

Thanks Phil!…..I can’t wait to do another! …


and how did you do the laser cutting in the headstock

I did the design, which is of course egyptian hieroglyph for Queen Bee” engraved at – no shit – the Trophy House in Fargo North Dakota – built a jig so it would sit level in their laser engraver.

The yellow is water soluble artist’s acrylic dries really fast – does not react with lacquer so clearcoat right over it

Posted on

Peake Performance…

Build your own guitar

Phil,

Thanks  for the email.  The experience of building the Les Paul from your neck and body was really great. The build went really well – particularly enjoyed learning to do the binding.  The only thing not yet done is the headstock inlay and logo – and that because I’m still debating.  But, she plays superbly.  The action and feel of the neck is really a pleasure and feedback from the musicians I play with (and who have played the new guitar) has been universally great.  So far the only maintenance work has been some work on the fret ends after the New York City winter set in – the heat dries everything to a crisp.  But I’ve had to do that on pretty much all my guitars.  In a word the guitar looks superb and plays incredibly.

Here’s a couple of images both before and after the pick guard was mounted.

Thanks again.  My go to guitar!

Posted on

Bruce’s Ocean Blue Beauty..

I love this job… check out what Bruce did with our “bones”


Phil,

I started with the non chambered ’59 carved top, customized with a flame maple top, ’60s slim tapper neck, ebony fretboard, and trapazoid inlays. I added Grover Rotomatic tuners, and a black TUSQ XL nut by Graph Tech.

The body only required a little finish sanding and it was ready to receive the dye.

I started by taping off the back and sides, including the natural masked binding area, and applying an initial coat of blue mixed with water to raise the wood grain. After sanding that off leaving the blue in that great flame pattern, I repeated the process 2 more times, the last application was mixed in alcohol to keep from raisng the grain again.

I set the neck and then taped off the top and the masked binding area as well as the fingerboard and stained the back, sides, and neck with a mix of “medium brown” and “mahogany red” dye in alcohol.

Next step was to start adding the layers of nitrocellulose lacquer, sanding between each coat. I finished by rubbing out the lacquer by hand.

It’s wired up with the Paul Iverson Drop in Pro wiring kit, and a set of Seymour Duncan SH-1 ’59 neck and bridge humbuckers with nickel covers.

The bridge is the Tone Pros Artisan Series T-O-M style bridge and tail piece. Love the locking feature on this set.

The precision of the neck and body made this build a real pleasure.

Thanks for your continued dedication to producing quality neck and body sets.
Bruce