Hi Phil,
finished it less then 1 hour ago, i love it!!
It resonates like crazy and the tone is awesome!
Broke a string during the first test run, but i wanted you to see it fresh so here are some pictures.
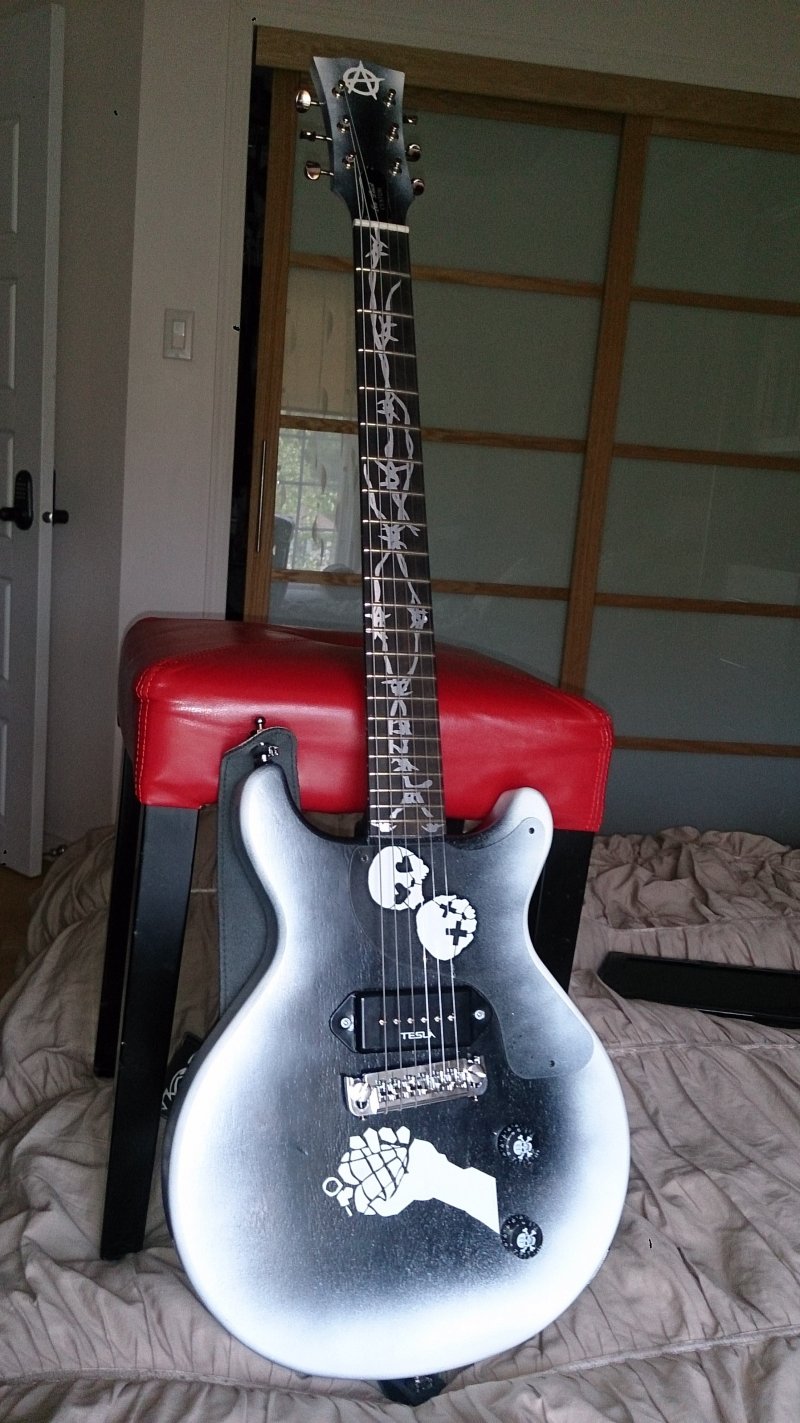
Named it Catch-22 from the famous book, if I’m crazy for building a guitar, or sane for completing it…..?
“There was only one catch and that was Catch-22. Orr would be crazy to fly more missions and sane if he didn’t,
but if he was sane, he had to fly them.
If he flew them, he was crazy and didn’t have to; but if didn’t want to, he was sane and had to.”
-Joseph Heller
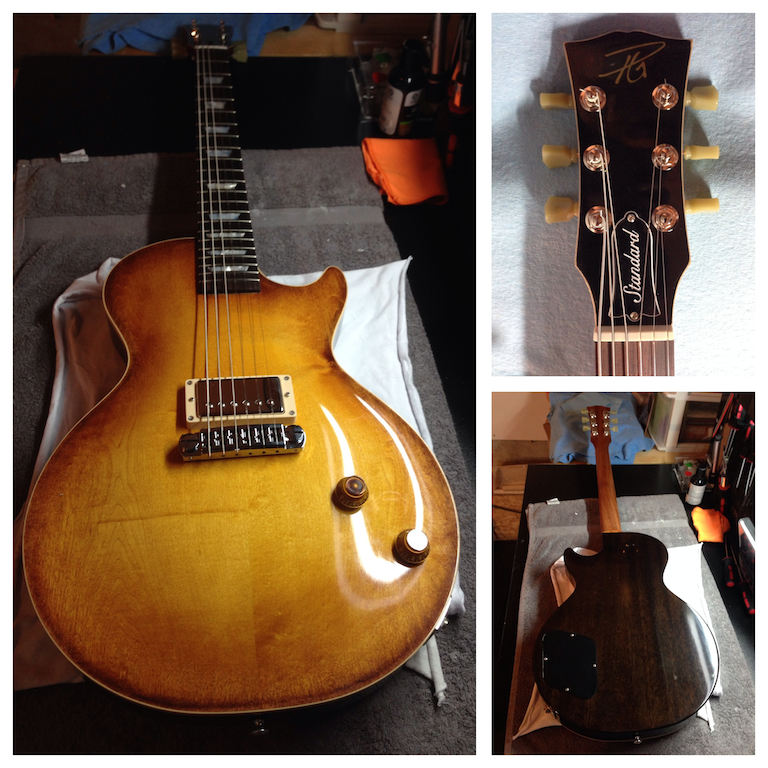
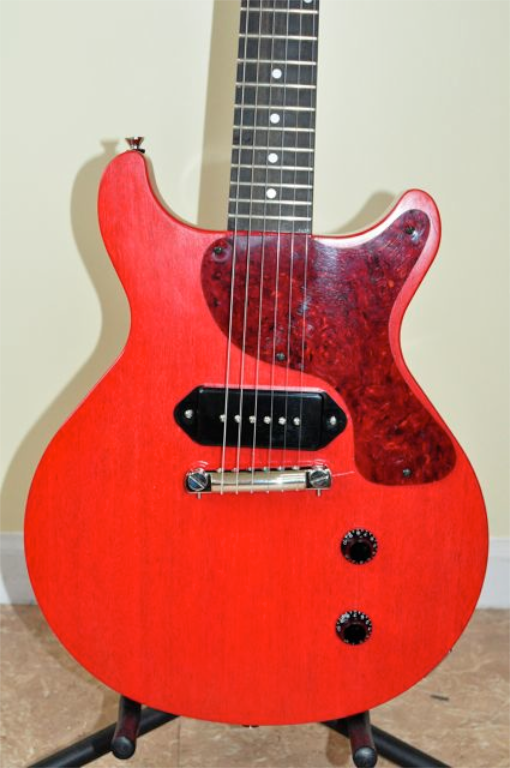
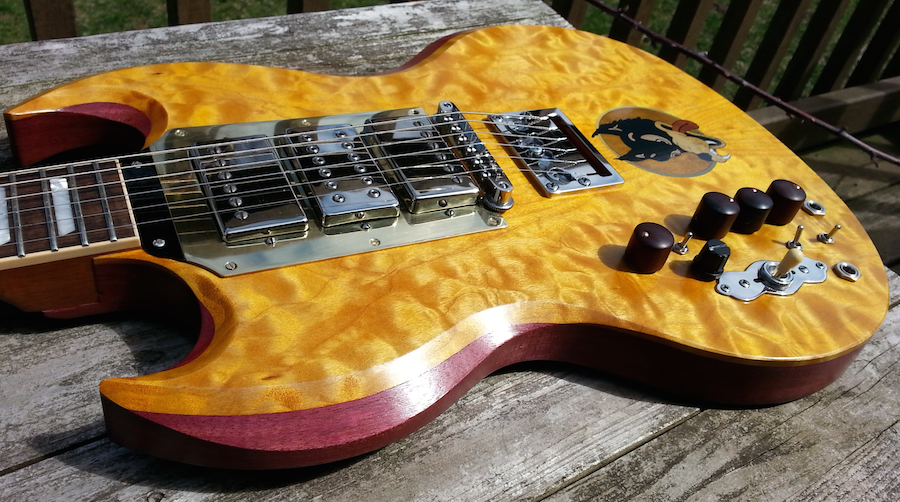
when i first got the kit i hated the baseball neck and saw an opportunity to do some custom work.
Shaped it medium asymmetrical from 1:st to 5:th fret and a chunky C the rest of the way. it came out 0.94″ 1:st fret-1.07″ 12:th fret. Its really comfortable.
The goal was to build something i wouldn’t find in a store, love the simple shape, and that its much lighter then a regular Les Paul 🙂
i knew right away that i didn’t have the skills or patience to do fancy burst, this was going to be a bad as player that could take a little beating.
It was a fun experience and it came out awesome!!!
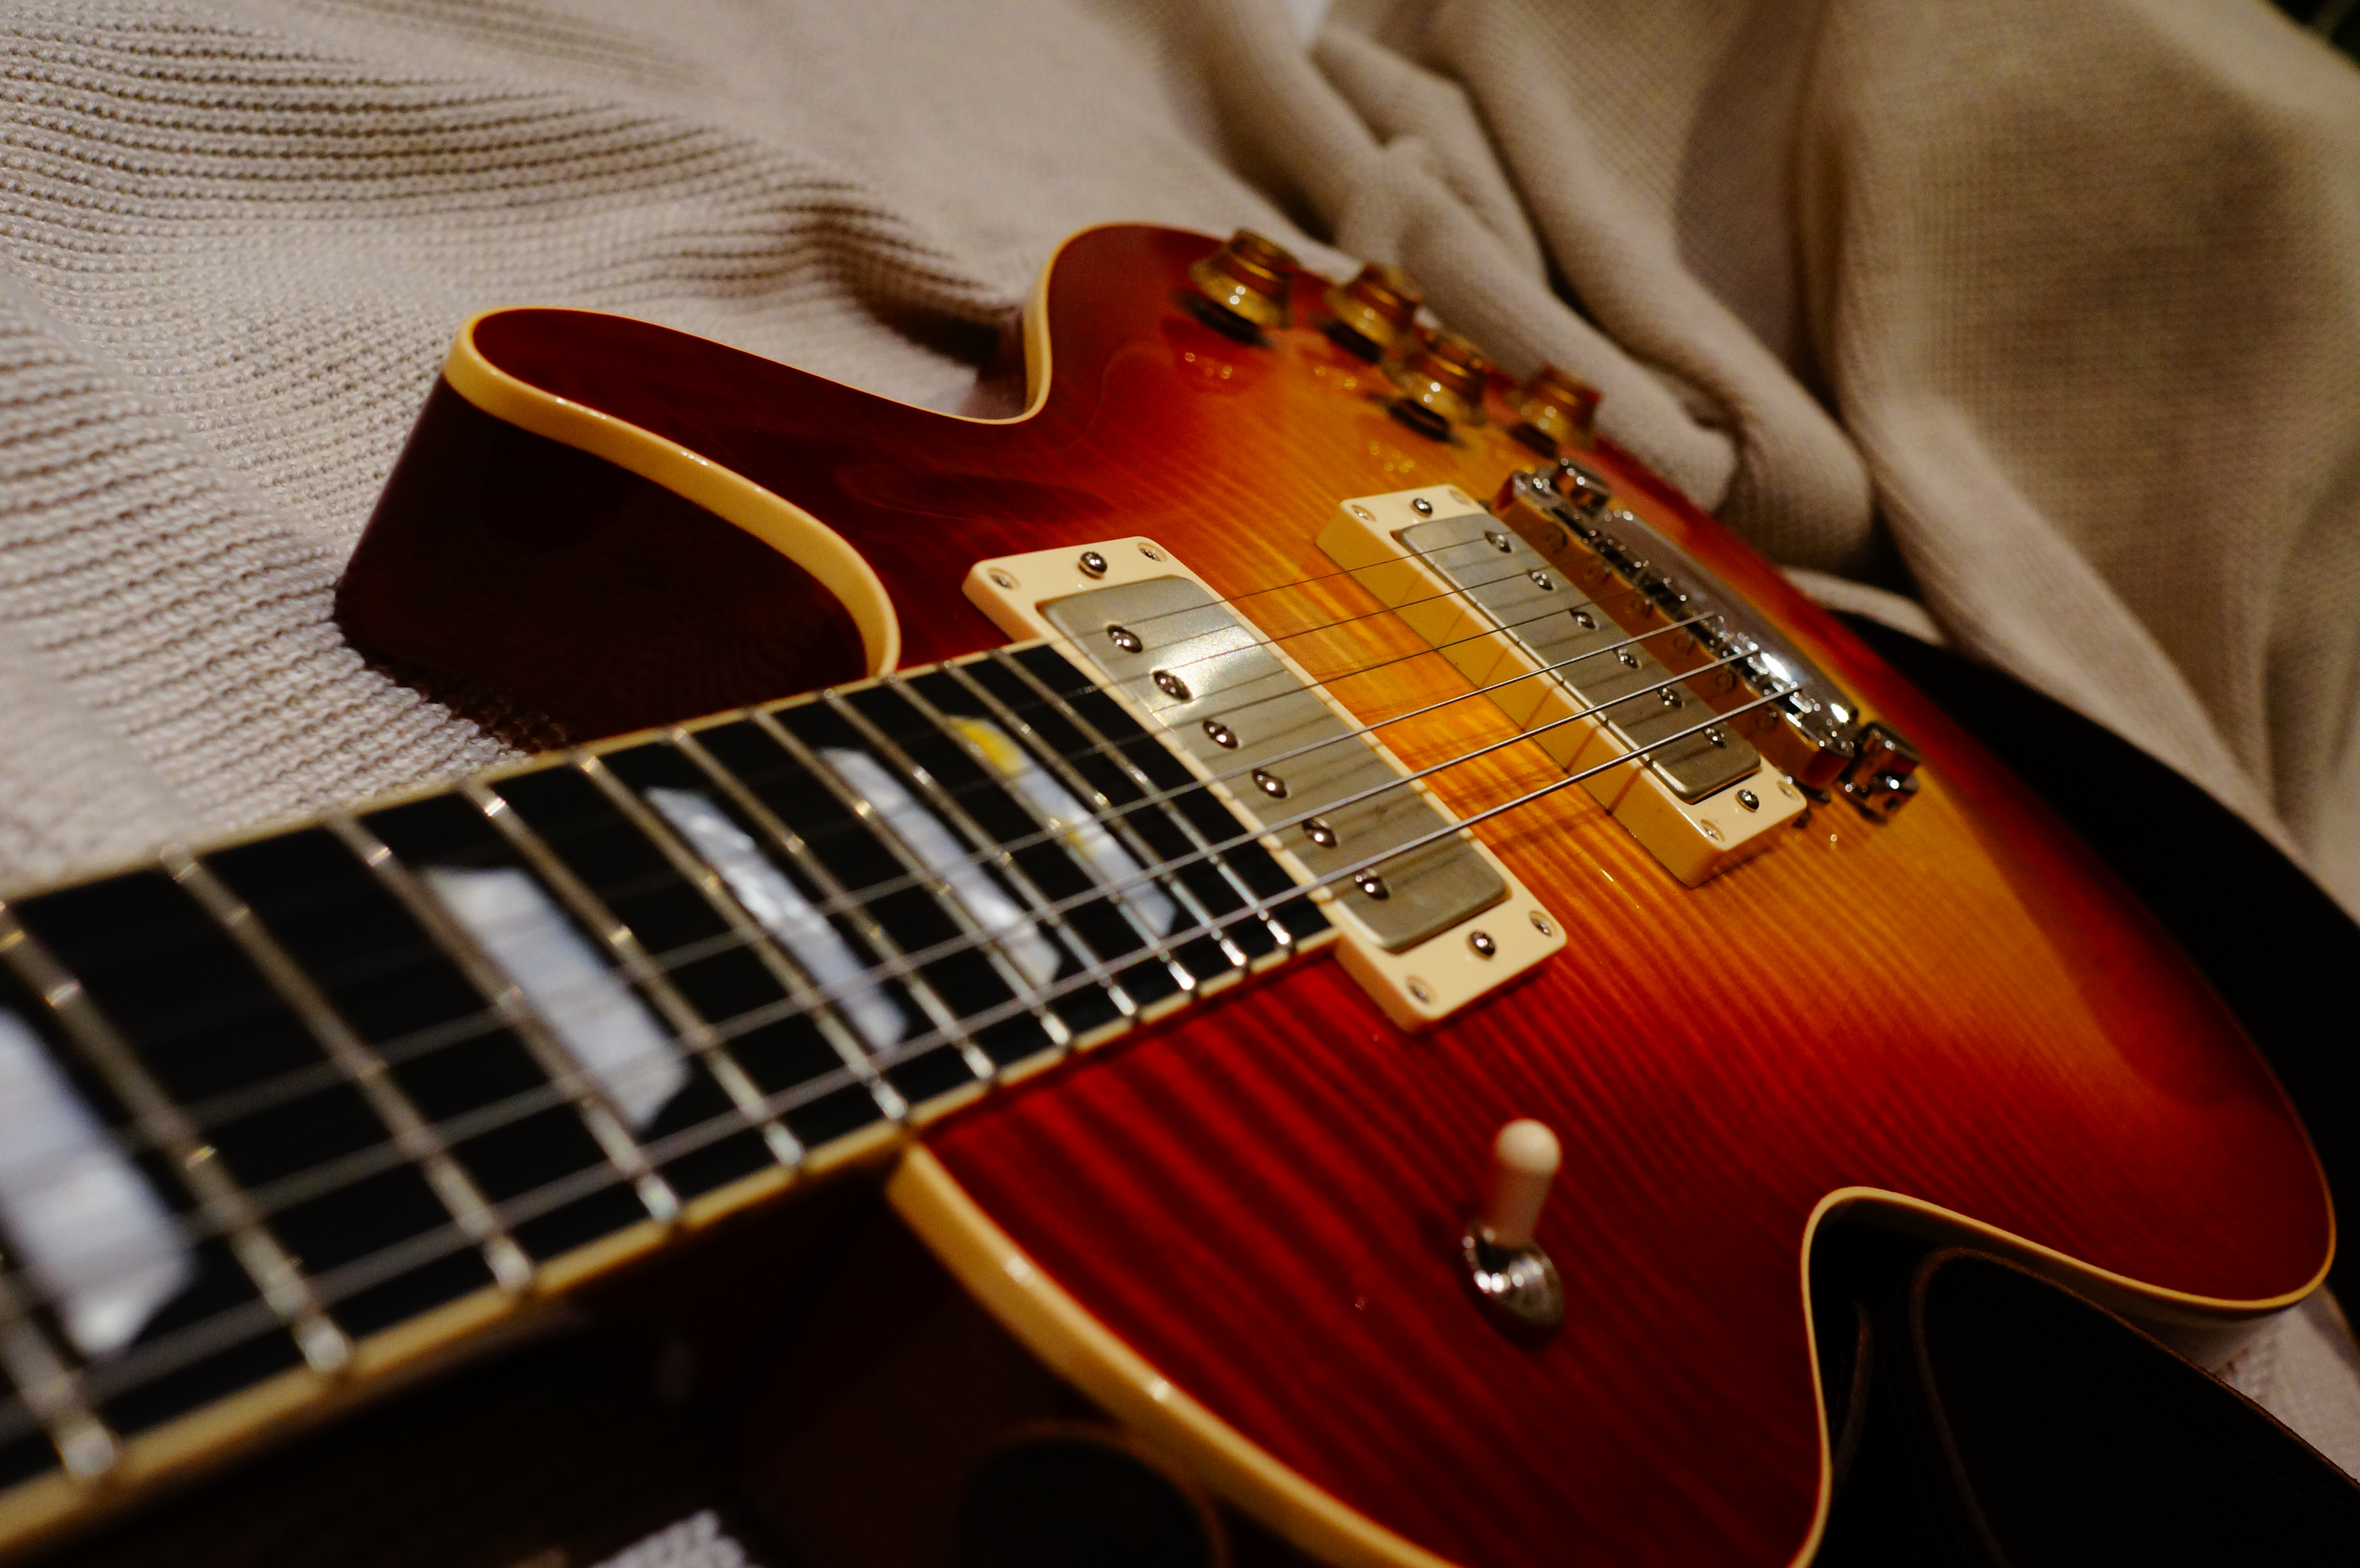
some specs for the geeks:
Grover Sta-Tite 18:1
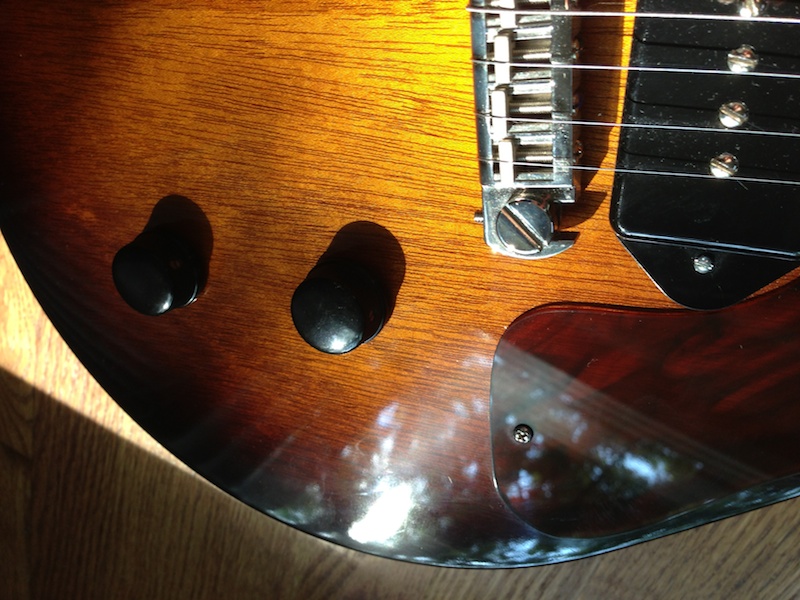
Home made mahogany covers
Bone nut
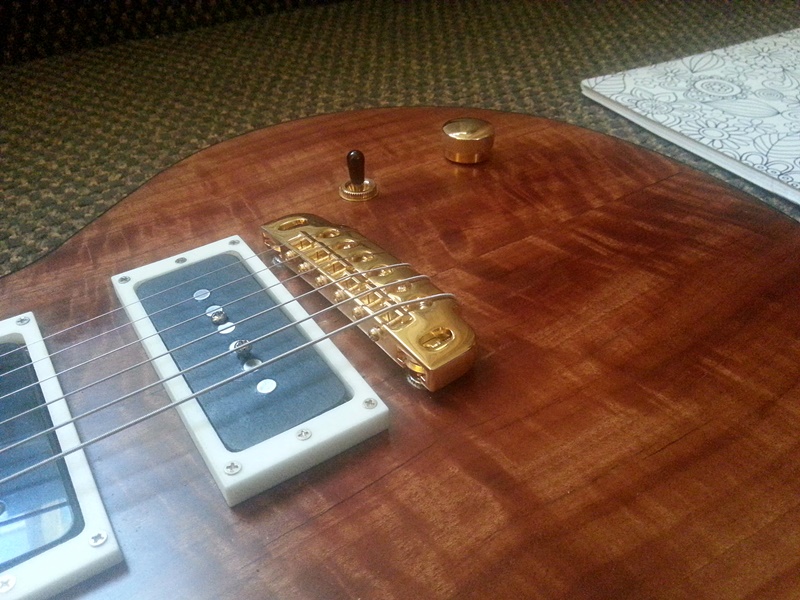
Neck pickup Arcane/Echopark Gold Coil
Bridge pickup Arcane PX-100
Cts 500k pots
Emerson Pio cap 0.47
Treble bleed circuit on volume
Switchcraft switch
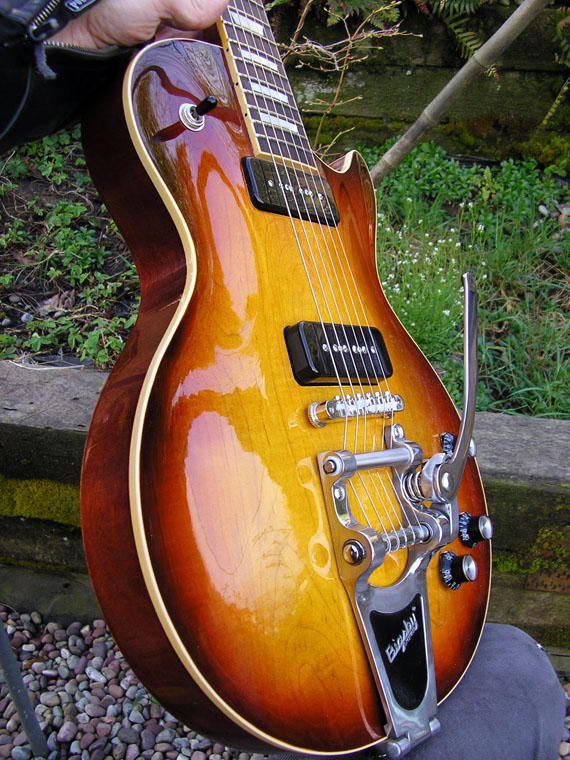
Gotoh bridge/Tailpiece
Thanks for the “bones”
now I’m finished and i wondered if i can make the builders page 🙂
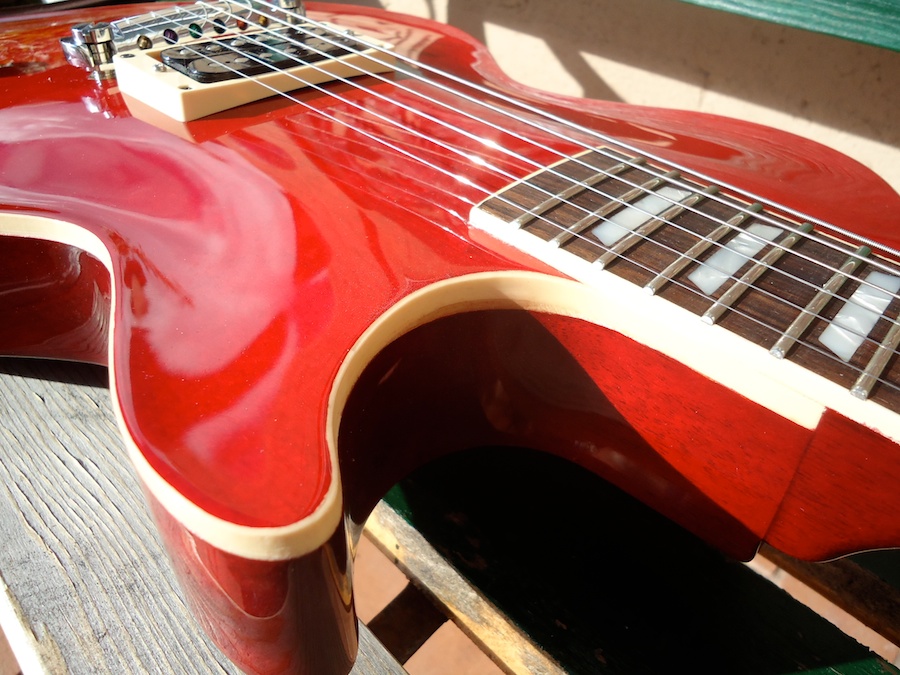
I’ve been doing some tweaks and its coming together nicely, did a scorching effect on the covers that I’m really pleased with.
was a little bit anxious about the finish but its held up, its just one rattle can of ebonising laquer, super thin finish. the top was so smooth out of the box that the laquer melted over it and i haven’t even sanded it after paint, its perfect.
love the rough look and and glad i didn’t grain fill the back.
Did a slight relic on the hardware with muriatic acid, its just right and sets the mood.
The neck is awesome 0.94″->1.07″ with my custom shape.
i can’t say enough good thing about the pickups, both made by arcane and they are fantastic.
The bridge is a overwound P-90 that is crystal clear, and the neck is a reproduction of the japanese Teisco gold foil. It just blows my mind every time i pick it up i find a new shade of super sweetness 🙂
I’m glad i decided to buy this kit, the build has been fun experience and the finished product feels, looks and sounds like a sweet grilled marshmallow wrapped in barbed wire and sent trough rock n`roll bootcamp 😉
Thank you, i will enjoy this one for many years.
Emil Eklund


")