This was a show in my neck of the woods on hot sunny summer’s day.
This is what some of the folks who have put their damn good efforts into.
I love this. One pick up 57 carved top, with just enough clear on it to keep the beer off and she’s ready to go. Check out is Scott’s inlay and stinger.
From Scott:
Really excellent , as good as it gets ! It’s freaking awesome .
Phil ! Yeah I went organic with this one , I did a egg wash sealer coat which was super easy and very effective , simply brushed on a egg white , nothing fancy no chemicals and very cheap .Just one egg So then on to a brushed on shellac wash coat . I dyed the Red stinger on and vignette on the headstock . I then sprayed 3 coast of Shellac with a Preval and it just went on flawlessly . I did my first ever inlay work . I used a Dremel and a nice small bit from Stew Mac and it cut like a hot knife through butter .This was a tribute to my 2 kitties I had for 18 years Yin & Yang sister tabbies . They had a wonderful life and finally said farewell a few months ago, they will be missed but not forgotten . So a few months back before Yang was slowing down she painted some paw prints with “milk paint” and I used those prints of hers to do the headstock inlay. I used a very beautiful and easy to work with “Box Elder “wood for her inlay and with the vast resources that is” my les paul” forum I found all I needed to know about inlay . Cutting and using superglue and sealing the inlay went exactly as planned .Then it was on to attach the neck , I used Titebond original . The Neck joint was flawless and indeed high Precision ! Let that set up for a couple days .Shot a few more coats of shellac and after a few days to dry I put a few light coats of Minwax wipe on poly to lock it all in . I really love the satin look you see a lot of on guitars today , it’s organic and natural but will hold up to a few spilled drinks if it must . Then it was all about putting in some sweet parts to complement the fine woods .
I used the very hip compensated wraptail bridge from http://www.mojoaxe.com/ and a most excellent PAF from http://sheptone.com/ of course Tonepros tuners and locking studs finished it all off .
In the end the build is way above and beyond what I hoped it would be , it’s magic from the first note . I have never experienced anything like it . I’ve been so thrilled with this and words cannot not fully describe how amazing this whole thing has been and the joy and lasting thoughts & memories that have went into .Thank you again Phil and everyone at PGK for giving us these wonderful kits in which to build on and play our music. All the best
here it is plugged in..take a listen
His “Lee Paul”
This is awesome…standard kit with binding and a paddle headstock. Look how the regular maple cap’s flat sawn grain pops with the honey stain and the high gloss clear coat on top. Check out the headstock. the tuners and the babicz bridge system.
Thanks for your kind words — it means a lot to me. I have always wanted have a 59 custom built to my specs, so I feel fortunate to have found you.
As far as staining and finishing is concerned — for better or worse — I began with a set of rather inflexible ideas: I did not want to grain fill using the conventional products (either water-, oil-based or epoxy). And, since, I had resolved to french polish the entire guitar using de-waxed, clear shellac, the choice was simple. I used 4F grade pumice stone along with the initial coat of shellac to grain fill the mahogany parts of the guitar — this was very labor intensive (on my next build I will try weakened hide glue which I used to glue the kit together).
I used W.D. Lockwood brand of water soluble dyes for the guitar (except the headstock which I initially used India Ink but decided to finish with Japan Ink (which I think yields a richer ebonizing result)). It was difficult getting the top to look interesting. I had no idea that maple was such blotchy wood. On top of that, I really wanted to show the grain (or the annual rings of the top). Basically, I treated the top as an artist’s canvas. Putting more stain where it needed and using bleach to lighten parts. I also sanded with various grade of 3M micro abrasive pads to accentuate the grain and to blend in various shades. I was fighting the wood basically. I thought about using gel stain after a week, but I am stubborn — so I stuck with it.
When I achieved certain “blotchy” look deemed interesting to me, I started with French polishing. Initially, I had put on quite a layer of shellac (about 8 bodying sessions). The guitar looked better than it did now (it really looked like a jewel) — but then I noticed the tap tone of the guitar had deteriorated somewhat. I took about half of the layer off.
After about a week, I used pumice stone (along with little walnut oil) to even out the finish and continued with medium to fine rubbing compound. I then used swirl removing compound and proceded to Maguire’s Show Room Glaze #7. On the back of the guitar I added a very thin layer of bowling alley wax with high carnauba wax content (no silicone!).
Did you notice that there is a real violin purfling on that guitar (no plastic binding)? Also the pickup rings are ebony and the scratch plate was carved out of ziricote (is that some sort of rosewood — very brittle).
I think I am asking too much of you to read this (i am rather long-winded), but you will be pleased to know that this guitar sounds amazing!!! And, I have played a real ’59 paul (owned by Jimmy Vivino). Over the weekend, I went over to my friend who owns 20 Les Pauls of various vintage — I have to tell you I would not have traded mine for any of my friends, ha, ha…
Thanks again, Phil. I hope to scrounge up some more change to buy another kit from you.
This is a great business… here is the start of a damn fine instrument…
Hi Phil,
I just finished spraying the guitar and thought you might like to see what I came up with for color. I haven’t buffed it out yet and I see that I missed a spot on the heel, I’ll fix that before I polish! These are really poor shots, the guitar looks a lot better in person. I’ll try to get some better shots when I’m further along.
Many Thanks,
Gotta check this out. This guitar was built by one of our illustrious builders in Quebec. I was just chatting with him on the phone about it and he says “Guydoun” is french for a woman of easy virtue… Love it… That’s a damn good thing to hold in your hands for a hours at a time…
He’s done an amazing job with this. A set up to get the Peter Green Tone, the pick ups are intentionally set that way and then the burnishing of the pickup covers and the pickguard. Awesome.
The back is tung oil, he says he took it up to a 3000 grit. See I told you he was industrious.
Here is Bob’s guitar. Man oh man, he did this beautifully.
I used RIT dye for all the staining then many coats of spray on nitrocellulose lacquer.
Back & neck scarlet/brown stain rag rubbed. Top mixed some brown, rag rubbed the top & sanded all off (to highlight the deep maple grain). Mixed yellow/ small amount orange then rag rubbed. I used same red stain from the back to rag rubbed the burst, used more yellow/orange, to mix down the red to have a faded burst. Lacquer.
Headstock mother of pearl inlayed.
Check it out…
Now this is so very cool. Bryan built one of our kits for his 9 year old. Check the kid out on stage…
“About 18 months ago I purchased one of your LP Jr. double cut/double rout kits and went through my first build and finish job on a guitar. It turned out much better than I expected from the work I did but, as you say, the bones lay the foundation for a good guitar and you guys did 90% of the hard work for me!
The guitar is my son’s as I’m not the musician but enjoy the heck out of the process. He goes to the “School of Rock” here in Minnesota. Twice a year they hold a fundraiser concert to raise scholarship money for students (kids) who want to rock but can’t afford the tuition to attend. At these fundraisers they hold an auction or a raffle for items of interest to the parents/students. I’ve joined forces with a father who acquires lower end guitars, strips them down, and hands off the body to an artist or an auto body shop to get a cool paint job.”
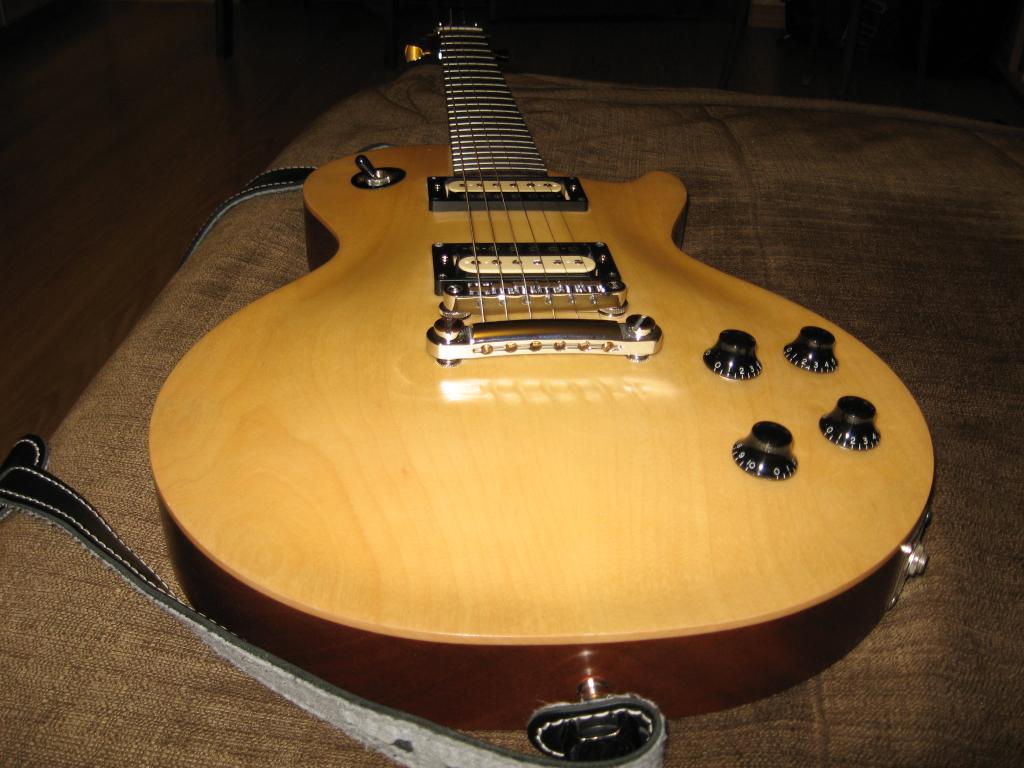
Here’s the start, when he received the kit:
“All I can say is ‘FN A’!!! It’s awesome—I picked it up today, and just put the neck up to the body… Wow! Well done, and thanks!
The body is even tuned—it rings like a damn xylophone, tuned to C! No shit – I can get C, G, E and C octaves out of it, just by doing the tap test! Unbelievable! Are the Tele kits tuned to G, for Keef Richards fans? Hahaha!
This is gonna be a seriously good guitar when I’ve finished it—it already is good, and that’s before I’ve even started. I’m not gonna stop singing its praises, and that retail thing I was telling you about—he’s eager to see how it turns out…
Believe me when I say that it’s not gonna be long before I order the Tele and 59 Customised kits from you as well!”
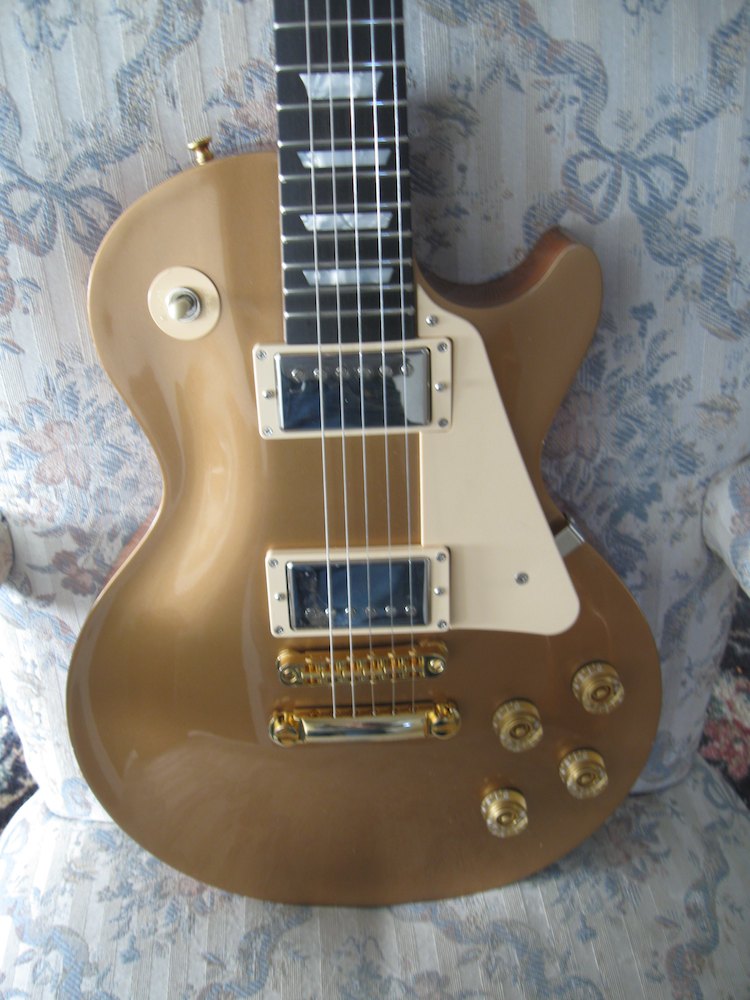
Then when he finished it:
“WHAT A SOUND! Cranking it through the ‘clean’ channel of a Fender Supersonic 60w on it’s 59 Bassman setting is absolutely unbelievable. Tonally, it’s probably about the sweetest-sounding guitar I have, which is quite possibly down to the woods that you use as well as the size of the neck. It might be big, but it’s not in the least bit uncomfortable!
I’m looking forward to getting many years of service out of this one, believe me!
(Feel free to print whatever you want from the above on the website, if you want to—and include the photos as well, if you want too. In fact, I’d feel privileged to have them up there for all to see!)In the meantime, the guys in the shop absolutely loved it, and I’ve been busy singing Precision’s praises to all that I can, with every opportunity I get, so fingers crossed it produces a few results for you!
Many thanks, and I’m looking forward to ordering more from you shortly!
All the very best! Chris”
Anthony’s quilted maple beautiful. I just absolutely love the look of this! The quilted maple cap looks liquid, like it’s moving. Wow. Love it, great craftsmanship.
“Hi Phil, I thought you would like to see the finished article. It sounds and plays like a dream, many thanks.
Pickups are Lollar Imperials with the bridge pickup being the high wind option.
Electrics are CTS 500k true vintage taper pots, Luxe bumblebee caps, switchcraft selector with braided wiring.
I’m hoping to capture a vintage bluesy tone in the neck and a sweet singing tone with a bit of scream at the bridge. The guitar is becoming an international affair with parts being sourced from all corners of the globe; the filthy swine at British Customs are having a field day.”
Check this baby out!!!
“This guitar has a beautifully figured black limba solid body and neck cut for me by Precision Guitar Kits, both stained amber. They do beautiful work, and their necks are just super! The neck has a rosewood fretboard, and features the distinctive Hampton headstock. A Graph Tech Resomax Wrap bridge with string saver saddles and a Graph Tech Black Tusq nut give great sustain and tone. Tuners are Grover Super Rotomatics, with the art deco buttons that seem to be made for this guitar.
Pickups are GFS Dream90s—fat, hot, single coils. These are significantly hotter than a standard P90, and have a little more balance in the tonal range, but still have that trademark P90 high-mid bite. The neck pickup is big and bluesy, and the bridge pickup is sharp, sweet, and full of nice overtones when no treble is cut, but the treble bleed can be rolled up to get a Fender-type sound. They are mounted with black metal mounting rings…they have a much better look than the plastic ones that come with pickups.
The volume control also has a push-pull switch that, when pulled up, runs the two pickups in series like a big humbucker. I also use a blend control instead of a pickup selector switch to give access to the full range of tones that can be found ‘in between’ those three positions. Bourns pots, Vishay-Sprague orange drop cap for the treble bleed, Switchcraft output jack, unique hand-crafted pickguard, and black metal knurled knobs on the controls complete the complement of electronics and hardware used on this latest Hampton Bel-Air Custom solid-body electric guitar.”
“I just finished my build today. It is awesome! It’s made out of very good quality tonewood and as your name suggests, the kit is made with precision. When I received the kit, I didn’t really know what pickup/control configuration I wanted. I decided to go with two classic PAF humbuckers, three-way switch, and single volume and tone … simple, but I have everything I need! I did the finish with oil. It keeps the texture of the wood, which I particularly like—mahogany. The pickguard is my own design. It is a mix of the classic “full-face” SG standard, “half-face” of the 61′ SG, and the pickguard of the 1998 SG deluxe. I love the look and the tone of bigsby vibratos. And this one makes no exception! This guitar looks great, plays great AND sounds amazing!
Here are some pictures of it.”
“Hi Phil, at long last the kit is finished and I thought you might like to see the pictures. Although delivered last November, time was not on my side and we finally finished her about four weeks ago.
I was helped by a friendly local luthier ( Richard Meyrick ) with the neck fit—about 25 mm removed to bring it to equivalent of a 60’s Gibson slimline neck—à la 335 , LP etc. Richard did the paintwork—I was looking for an authentic 58 Jnr finish—which I hope you agree looks the part. Richard made the scratch plate and control cavity plate.
I bagged myself a genuine P90 from an old Gibson 330 on eBay and the hardware all came from Julian at Fake 58.
Now that she is up and running, she sounds fantastic—I am keeping her for slide work almost exclusively and she doffs her hat to Doyle Bramall 11 ‘s 58 Jnr. The truss rod cover says “’58 Jnr” and my initials in chrome.
Thanks again for a great piece of work—the quality and neck fit were superb.”
This is Keith’s first build.
Here is the order of what he did to the quilted maple cap. Ends up being beautiful.
Pic 1
Here it is dyed with red mahogany dye as the base layer
Pic 2
Here is the first colour session. You can see where the colour absorbed more on the perimeter in some places, so it was destined for another layer.
Pic 3
Here is the how the final dye session turned out. I found that I had to over-concentrate the dye about four times the recommended strength that the dye suggested in order to get the yellow to come forward the way I wanted. Like I said, I will send you a good picture of the finished product all strung up with close to eight hours playing time on it. I just have to go take it first. I just finished it up last Sunday at about 11pm, so it is still adjusting to string tension, but man does it sound great.
Pic 4
Here is a photo of it before I strung it up. It’s strung up now but I don’t have any photos of it as it stands. The sound and sustain is incredible, I used all vintage pots and resistors so I could get an old school vintage sound. Can’t beat the sound of a vintage guitar so that’s what I was going for, and I achieved it.
He is going to send me along some pics of it strung up. Will post them when I get them.
So this guitar came off the shop floor and Markus took one look at it and had to have it. He is a meticulous builder with a wealth of guitar lore and knowledge, always an interesting guy to talk with.
So here is what he has done, Tru-Oil on the black limba. It really brings out the wood’s highlights, just beautiful… In person it is even more dramatic and the feel of a Tru-Oil neck in your hands is really, really fantastic. It has the Seymour Duncan Antiquity Pickup in it and the Gotoh Wraparound Bridge. It is waiting for the Bake-lite pickguard.
He also just happened to have a bumblebee cap, from a LP 58, just sitting around waiting for a home and here it is.
I will get some video and sound clips from him in the next couple of weeks.
Here is a YouTube video put together by one of our customers. Just showing the kit and the steps he took to put it together. The music playing over the video is from the guitar he built. This was his first guitar build. He has used the Bumblebee Capacitors in his tone train. I like the warmth that is in the tone when it’s clean, but it still has just a great growl with the gain turned up.
“Hey Phil,
Here are some photos of my recent build, your SG Jr. I am quite pleased with how the guitar fell together. The neck is lovely, straight and true, I have not had to adjust the neck at all. And the guitar is very light and reasonant. I’ve always loved the look of these guitars and the Heritage Cherry finish came out as I had hoped. She is a real screamer with the lollar P-90!
Thanks, Tony”
“Hi Phil,
Thought I would send you pics of the finished product from your body/neck kits. The second kit I bought (the blacktop), had obvious improvements over the first one (purchased a month earlier). I really appreciate the fact that you are constantly improving the product. The Blacktop is simply a superb guitar, the fit of the neck was perfect, the routs were exact, and the neck/fretwork was perfect as well. Not that the earlier one was a problem, I just had to massage the cavity covers a bit, and the truss rod access is a bit different. Overall, I couldn’t be more pleased with the results.”
Pure cool craftsmanship. This is a stunning guitar.
“Hi Phil…I am very happy with the way this build went. You really got this thing right!
Excellent foundation for a one-off custom guitar.”
I asked Steve how he built this guitar.
“I started by gluing down a fine sheet of walnut burl and routing the binding channel. Then I enlarged the control cavity and made the tummy cut and the PRS like cut at the bout. then the body got a very light stain and many coats of lacquer.
The peg head has an ash burl veneer with lacquer, the rest of the neck is tung oiled only. I installed a General guitar gadgets booster circuit and used a .047 oil and paper type capacitor on the tone pot. The pick-up is a DiMarzio P-90 with a walnut cover homemade. The guitar has a nice feel and sounds good. Will probably build one of your LP kits next fall.Thanks again, Steve”
This is a cool, cool guitar. As the headline says Natural and Naked. Not only is the mahogany we use fantastic tonewood, but also just such a beautiful looking wood too. Here is one of our who-digs-the-wood-grain-like-we-do. Simply shows it off.
“A few pictures of the recently finished Junior. It doesn’t get much more basic than this…slab o’ wood, neck, and one pickup. She is built to JAM!
I really dug the grain, so I decided to just do a tung oil type finish…very happy with results. TonePros bridge, GREAT P90 from Mick Brierley, Tusq nut, and TonePros Kluson tuners. NO PICKGUARD…don’t want to cover up the grain.Cheers, Phil”
Check out the aged and cracked clear coat on it. Beautiful work.
“Hi Phil,
I just completed my ’59 replica based on your Jr. kit, thought I would share!
Thanks for a quality kit, the neck/body joint is really a great fit, very tight and snug, and the fretting job is outstanding, I do fretting myself and was prepared to refret it just in case, but man this really is nice work!
The project turned out great and the guitar sounds killer! Alive and resonant as they say, I guess it applies here… The Wolfetone pickup sure helps ;-)”
Just thought I’d send you pics of my finished guitar. The kit was purchased last year for Christmas. Finish it during last summer. Everything came out pretty well. It plays awesome.
Features: Custom Headstock Inlay by me. Engraved truss cover. Sperzel Trim Lok tunning machines, Tone Pro’s locking bridge and tailpiece, Jimmy Page style electronics and Seymour Duncans P-59 pickups. The finish is Nitrocellulose lacquer.
Here is one of kits, shipped to a builder with a paddle headstock so he can do his own treatment, make it his own. It does make it stand out. The ebony headstock overlay with mop inlay looks great. The pickup is a custom built Seymour Duncan 78 humbucker on a p-90 chassis with dog eared cover.
Here are some pics of his build:
This is our LP kit, with a simple beautiful finish. The plain maple cap wood grain shows up so nicely on this. Here is what Eddie as said about our kits.
“Thanks for a awsome kit. it plays better than my $%$#@ guitar.
Great fret work. waiting for a prs style kit now. I used trans tint amber and cherry and mixed them till i got what i wanted it went on darker than i wanted so i took clean wet towels and rubbed it down till i got the color i was looking for.i kept the neck and back natural and the maple on the side is like binding like on a prs.
Thanks again
Eddie
no images were found
Jono has taken an old school approach to this guitar.
This is his words:
The idea is for this to be the live gig workhorse – something serious with good components and a great sound (you cant beat P 90’s for that live tone!) but withoutthe silly price tag.
I put in a shot of the neck being set – because the angle is built into the neck (perfectly) we could actually set it in a stand! with no issues!
For the finish I put on a couple of coats of “indoor polywax sealer” with a cloth and I think it looks understated and quite pretty, the strangest thing is that I’ve had the guitar for a while now and I still cant tell what colour it is! The combination of the sealer and the wood makes it look different under different lighting conditions.
I swear its the same finish in all the photos (there might be one of the raw wood in there?), it looks like a different guitar in each shot! I’ve seen this sealer on other guitars never with this effect, I love that mine came out mysteriously special… Thanks for using rich beautiful wood!
Jono